Create an incident from a detector or sensor reading
You can create a new FH Mobile Response incident from any selected sensor.
Incidents created from a sensor reading are located at the point of the selected reading, and are marked on the map with a red star. The incident type is based on the sensor type, so that crucial guidance files such as checklists, first aid, and personal protection equipment (PPE) recommendations are immediately displayed on any FH Mobile Response client computer responding to the incident.
Example: FH Mobile Response is linked to a hydrogen sulfide sensor at 101 Main St., which is in alarm status. You can select that sensor and create a new incident based on the data coming from the sensor. The incident location is established as 101 Main, resources assigned to this incident are given that destination to route to, and relevant H2S guidance information appears in the incident's Guidance sub-tab.
Note: Sensor status and readings are not shared through a published incident on the FH Mobile Response server. Units must get sensor data directly from the detector sending the data to the FH Mobile Response server, instead of from data published by another unit.
Note: You must have purchased FH Mobile Response Premium to create an incident from a detector or sensor reading in FH Mobile Response. For information on upgrading from FH Mobile Response Basic to Premium, contact your FH sales representative.
- Display the detectors or sensors you want to work with, as described in Display or hide detector and sensor locations on a map.
-
Do one of the following.
- Choose Go → Tools → Detectors → List / Filters.
- On the Incident ribbon, in the Detectors section, click List / Filter.
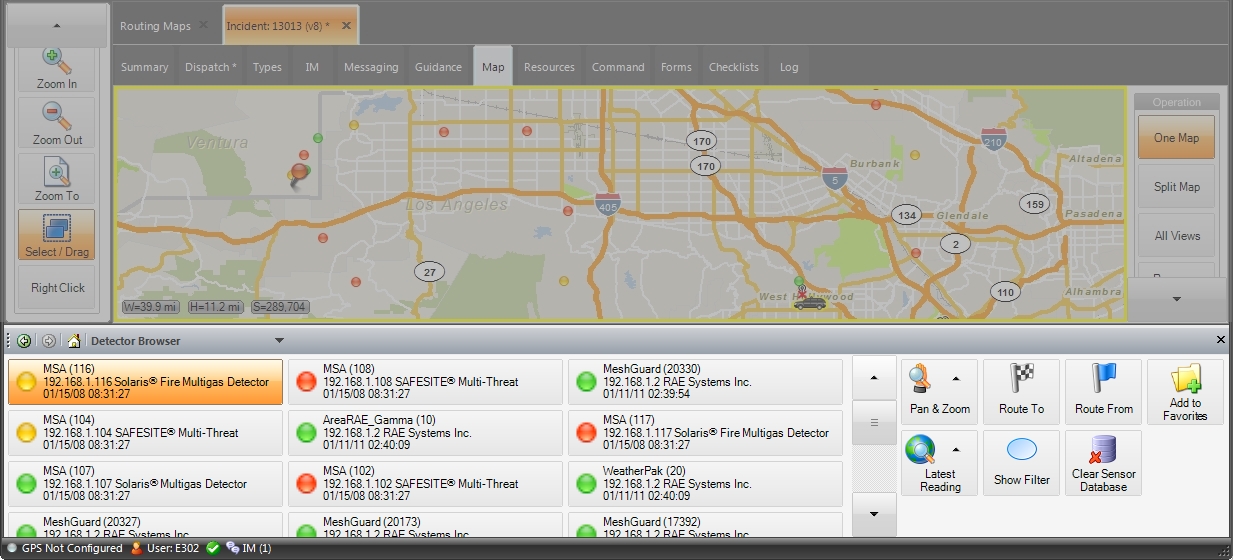
At the bottom of the interface, the Detector Browser appears, displaying a list of all the detectors or sensors. Each entry displays a color-coded status, brand type, ID, porting information, and a time stamp of the reading, depending on the sensor setup.
The selected detector or sensor reading is highlighted in the Detector Browser, and its location on the map is marked with a red push-pin icon.
-
Select the detector or sensor you want to create an incident from in one of these ways.
- In the Detector Browser pane, click the listing corresponding to the detector or sensor you want to select.
- To the right of the map, in the View / Op toolbar, click the Select / Drag icon, then in the map, click the detector or sensor you want to select.
The push-pin icon on the map moves to the location of the detector or sensor.
-
Do one of the following.
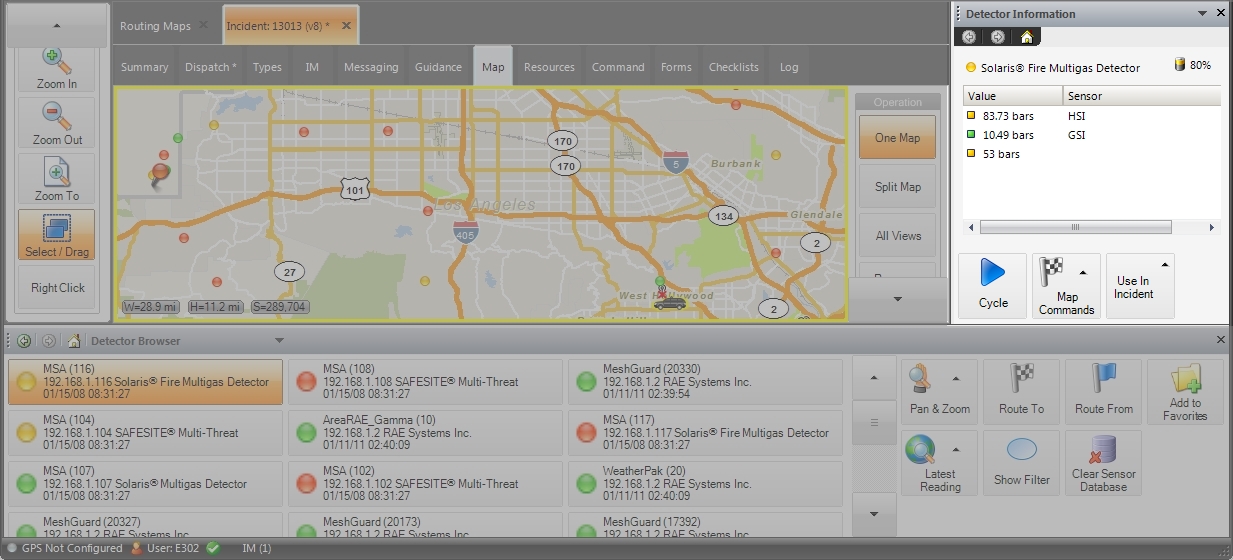
- Choose Go → Tools → Detectors → Detector and Sensor Info.
- On the Incident ribbon, in the Detectors section, click Detector and Sensor Info.
To the right of the map, the Detector Information pane appears, displaying data for all the sensors in the selected detector, or for the single selected sensor.

-
At the bottom of the Detector Information pane, choose Use In Incident → New Incident.
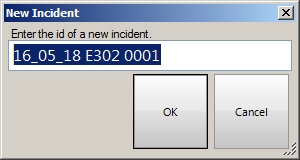
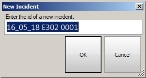
The New Incident dialog box appears.
-
In Enter the ID of a new incident, type the reference number to use for the incident, then click OK.
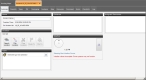
A new Incident tab appears, displaying the Summary sub-tab. The Location section of the Summary tab lists the latitude and longitude location of the detector or sensor, the Types section lists an element type related to the detector or sensor, and the Guidance section lists any necessary documentation for the element type.
-
Use the sub-tabs to specify information pertinent to the incident.
- Name an incident
- Work with the location of the incident
- View a summary of key incident information
- Work with elements (types) for the incident
- Work with instant messaging (IM) in the incident
- Work with email messages in the incident
- Access guidance documentation for the incident
- Use the map dedicated to the incident
- View resource assignments for the incident
- View command information for the incident
- Work with forms needed for the incident
- Work with checklists for the incident
- View the activity log for the incident