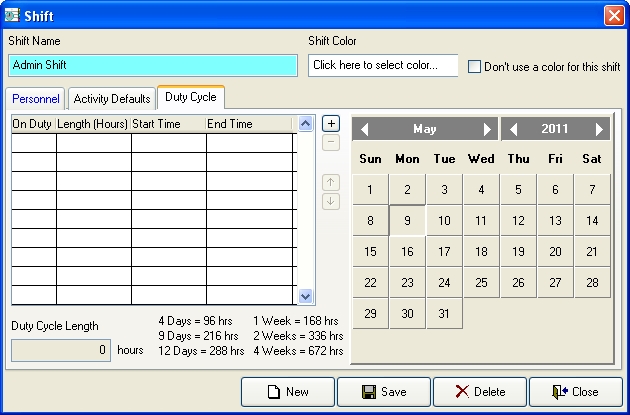
Define a duty cycle for a shift
Tip: To see a visual representation of the duty cycle as you are defining on a calendar, enable the display of color coding as described in Set workstation-specific scheduling options, before doing the steps below,
- (If one is not open already) Open an existing schedule.
- (If it is not selected already) Click the Shifts tab.
-
Select the shift you want to define duty cycle for, and then click Open.
The Shift dialog box appears.
-
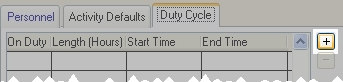
Click the Duty Cycle tab.
-
To the right of the time grid, click the plus button.
The first row of the time grid partially populates with data. The value in the Start Time column is based on the time you specified in the Schedule dialog box, in the Start Time field, when you added the schedule.

Information on adding a schedule is available in Add a new schedule.
-
Click in the On Duty column, in the highlighted cell, and type a
Yor anNon your keyboard to indicate whether the time range you are defining is an on-duty range (Y) or an off-duty range (N), and then press Tab or Enter on your keyboard.The cell in the Length (Hours) column for that row highlights.
-
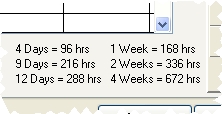
In the Length (Hours) column, in the highlighted cell, type the number of hours in the cycle, and then press Tab or Enter on your keyboard.
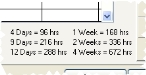
Tip: The number of hours for common intervals of time are listed in the dialog box, at the lower right corner of the time grid. Most shifts will have a duty cycle length that is divisible by 24.
The cell in the Start Time column for that row highlights, and the value in the End Time column for that row is calculated for you, based on the start time and the length you specified.
Caution: When defining the length of a duty cycle, you must keep in mind the date and time specified in the Schedule dialog box, in the Start Date and Start Time fields. To get a duty cycle to start on a specific day of the week and at a specific time, you may need to add an off-duty cycle before the on-duty cycle to achieve the actual start day/time you want.
Note: A detailed example of starting a duty cycle on a specific day of the week is available in Example: Add a shift starting Friday morning.
-
Click the plus button to the right of the grid again, or press the down arrow key on your keyboard.
A new row of data appears in the time grid. The value in the Start Time column for the new row is supplied for you, based on the value in the End Time column for the previous row.
-
Repeat steps 6-7 to fill in the information for the new row of data.
The value in the End Time column for the new row is calculated for you.
- Repeat steps 8-9 until you have added enough information to the time grid to complete the duty cycle.
- Click Save, and then click Close.