Example: Add a shift starting Friday morning
You want to add a new shift that is on duty every Friday, starting at 8:00 in the morning, and running for 24 hours. The schedule you are adding the shift to has a Start Date value of 12/05/2006, and a Start Time value of 08:00:00 (8:00 in the morning on a 24-hour clock).
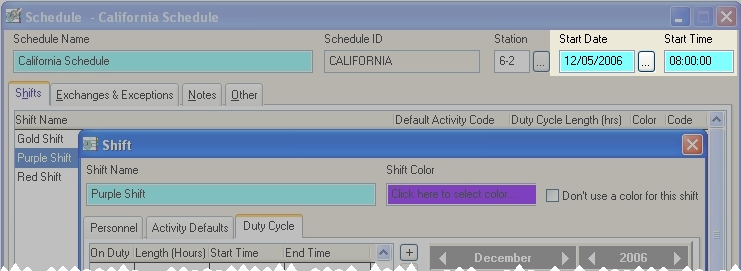
December 5, 2006, falls on a Tuesday, and you want your new shift to begin its on-duty cycle three days later, on a Friday. The shift needs to begin with a three-day (72-hour) off-duty cycle to account for Tuesday, Wednesday, and Thursday. Then the shift would continue with a one-day (24-hour) on-duty cycle for Friday, and finish with a three-day (72-hour) off-duty cycle to account for Saturday, Sunday, and Monday.
|
Note: If the Start Time value for the schedule had not been the same as the time you wanted the new shift to start, you would have needed to adjust the length of the off-duty shifts to account for the hours offset. Example: If the schedule Start Time value had been 00:00:00 (midnight on a 24-hour clock) instead of 08:00:00, your first off-duty shift would have been 80 hours to account for midnight Tuesday through midnight Thursday (72 hours), plus eight more hours from midnight Thursday to 8:00 Friday morning. The second off-duty cycle would have been 64 hours long, to cover from 8:00 Saturday morning to midnight Tuesday. |
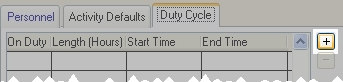
In the Shift dialog box, on the Duty Cycle tab, on the right of the time grid, you would click the plus button to add the first off-duty cycle.
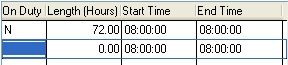
The first row of the time grid partially populates with data, and the value in the Start Time column is listed as 8:00 (the Start Time value in the Schedule dialog box).

In the highlighted cell in the On Duty column, you would enter N, to indicate that this is not an on-duty cycle. In Length (Hours), you would enter 72, to account for the number of hours from 8:00 a.m. Tuesday to 8:00 a.m. Friday. The value in the Start Time column is based on the Start Time value in the Schedule dialog box, and cannot be edited in the time grid. The value in the End Time column is calculated for you, based on the number of hours you entered in Length (Hours).
To add the on-duty cycle, you would either click the plus button again, or you would press the down arrow key on your keyboard. A new row of data appears in the time grid.
In the highlighted cell in the On Duty column, you would enter Y, to indicate that this is an on-duty cycle. In Length (Hours), you would enter 24, to account for the number of hours from 8:00 a.m. Friday to 8:00 a.m. Saturday.
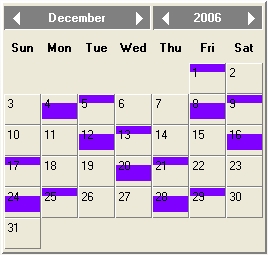
Note: If you had enabled the display of shift color coding on calendars, a color corresponding to the shift duty cycle you are defining appears on the calendar in the Shift dialog box. Because you have not defined the off-duty cycle for the remaining hours of the week yet, the shift does yet not consistently begin on Friday.
To add the second off-duty cycle, you would either click the plus button again, or you would press the down arrow key on your keyboard. Another new row of data appears in the time grid. In the On Duty column in this row, you would enter N, to indicate that this is not an on-duty cycle. In Length (Hours), you would enter 72, to account for the number of hours from 8:00 a.m. Saturday to 8:00 a.m. Tuesday.
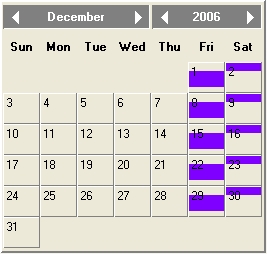
Now that all the hours in a seven-day week are accounted for, the calendar shows the shift as consistently starting on Friday morning and ending on Saturday morning.
You would then click Save to save the duty cycle for the shift.