Route to a detector or sensor location
If you have enabled the display of detector or sensor icons in a map, you can route from your unit's current location to a detector or sensor's location.
Note: You must have purchased FH Mobile Response Premium to view detector and sensor icons and information in FH Mobile Response. For information on upgrading from FH Mobile Response Basic to Premium, contact your FH sales representative.
|
Note: To route to a detector or sensor location, you must have already defined a starting point for the route in one the following ways.
|
- (If you have not done so already) Display the detectors or sensors you want to work with, as described in Display or hide detector and sensor locations on a map.
-
Do one of the following.
- Choose Go → Tools → Detectors → List / Filters.
- On the Incident ribbon, in the Detectors section, click List / Filter.
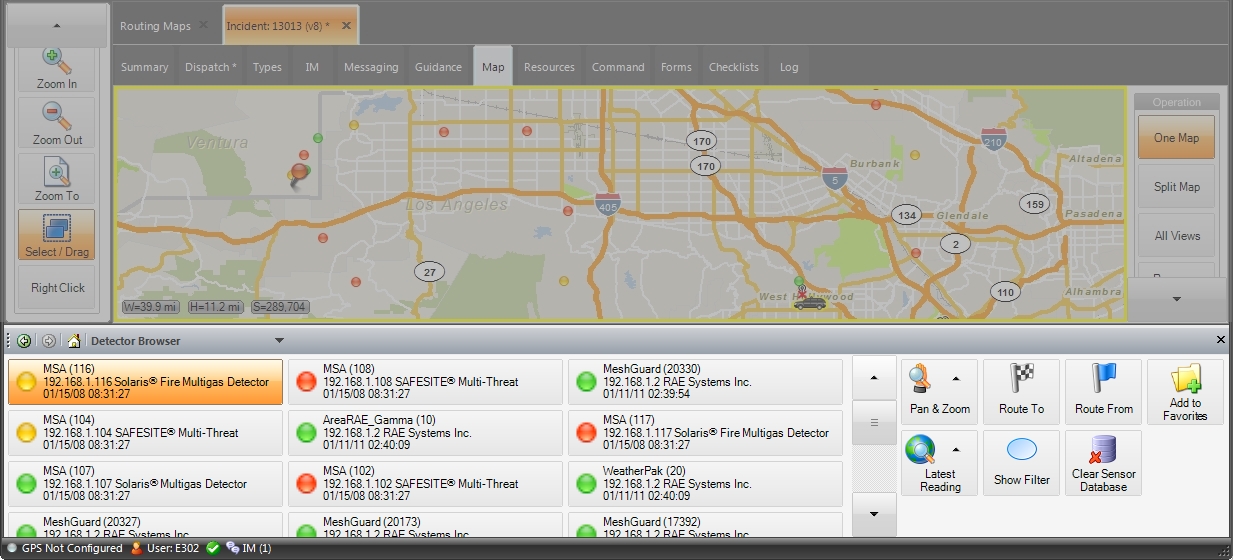
At the bottom of the interface, the Detector Browser appears, displaying a list of all the detectors or sensors. Each entry displays a color-coded status, brand type, ID, porting information, and a time stamp of the reading, depending on the sensor setup.
The selected detector or sensor reading is highlighted in the Detector Browser, and its location on the map is marked with a red push-pin icon.
-
(Optional) Display sensor data specific to the detector or sensor selected in the Detector Browser in one of these ways.
- Choose Go → Tools → Detectors → Detector and Sensor Info.
- On the Incident ribbon, in the Detectors section, click Detector and Sensor Info.
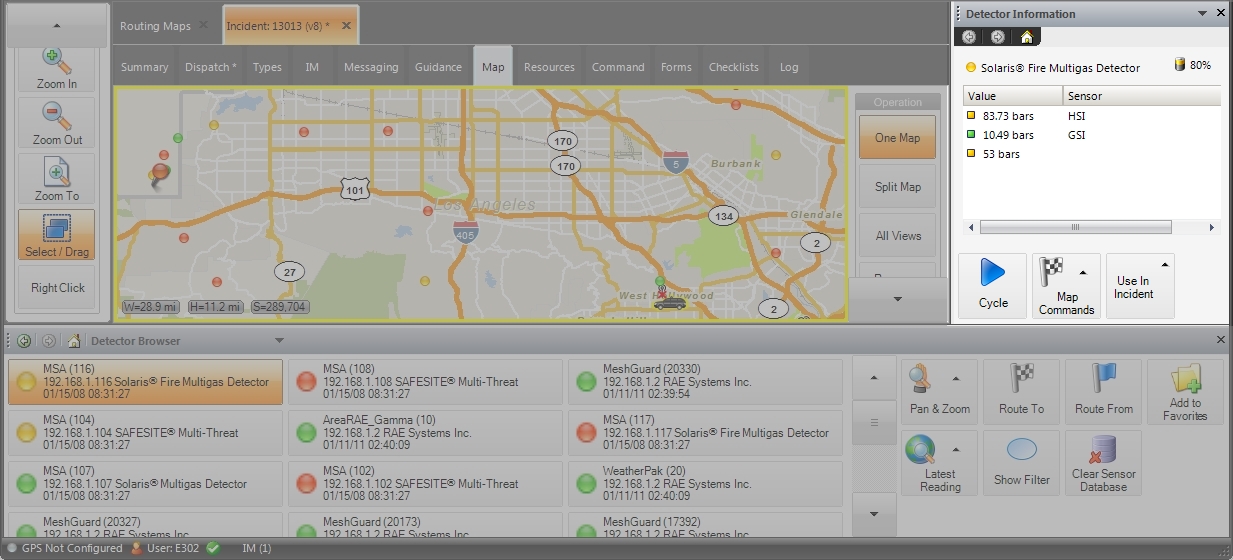
To the right of the map, the Detector Information pane appears, displaying data for all the sensors in the selected detector, or for the single selected sensor.

- (Optional, in the in the Detector Browser pane) Filter the list of detectors or sensors , as described in Filter detector or sensor readings.
-
Select the detector or sensor you want to route to in one of these ways.
- In the Detector Browser pane, click the listing corresponding to the detector or sensor you want to select.
- To the right of the map, in the View / Op toolbar, click the Select / Drag icon, then in the map, click the detector or sensor you want to select.
The push-pin icon on the map moves to the location of the detector or sensor.
-
Do one of the following.
- On the right side of the Detector Browser pane, click Route To
- At the bottom of the Detector Information pane, choose Map Commands → Route To.
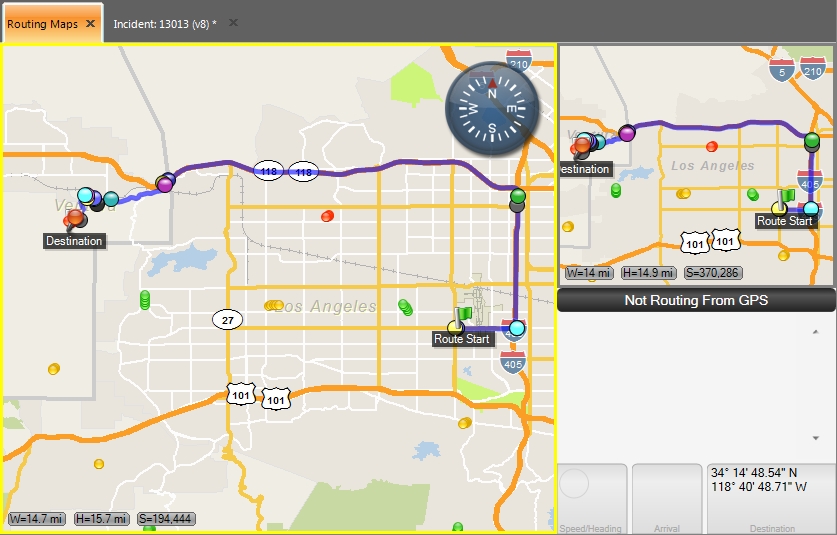
The Routing Maps tab opens, the
Destinationlabel appears on the map at the detector or sensor you selected, the route from the starting point to the location you selected appears on the map as a thick blue line, and each turn is identified by a colored dot. The smaller map in the upper right corner of the interface displays the entire route and, if you are using a GPS device, your current location on the route.
If you manually set the starting point, the turn-by-turn directions pane in the lower right corner displays the message
Not Routing From GPS, and only the address of the found location appears in the pane. If you are using a GPS device, the turn-by-turn directions pane populates with additional information.