Apply a refund
- (If one is not open already) Open an existing account record.
-
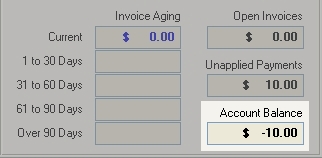
In the lower right corner of the Account dialog box, check the amount listed under Account Balance.

-
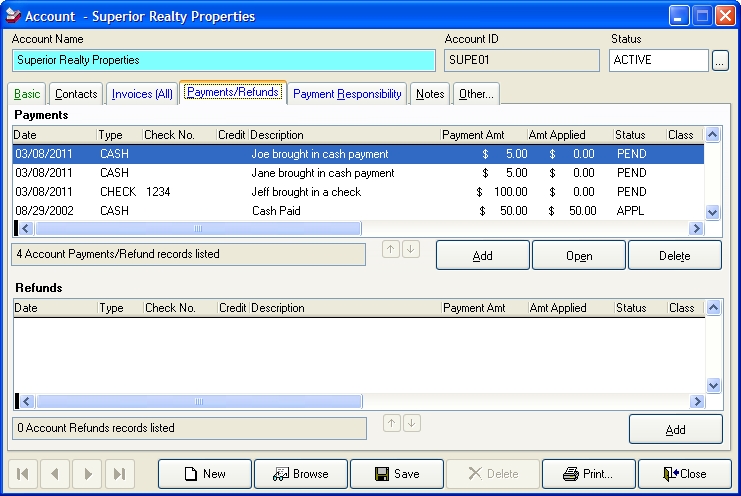
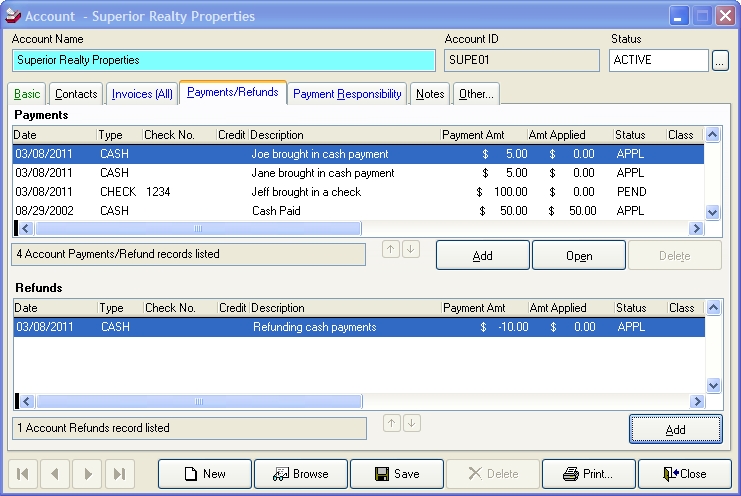
(If the amount is negative) Click the Payments/Refunds tab.
-
Under Refunds, click Add.
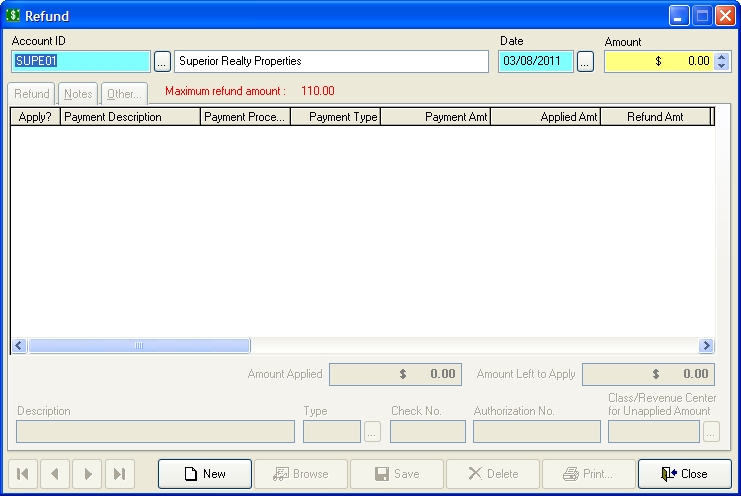
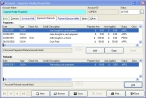
The Refund dialog box appears, and the maximum amount that can be refunded for the account is listed in red text near the top of the dialog box.
- (If necessary) In Date, enter the date the refund was made, or click the lookup button
 and then use the calendar that appears to select the date.
 -
In Amount, enter the amount to be refunded.
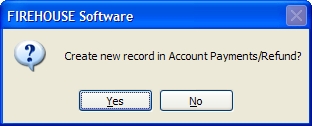
A confirmation dialog box appears, asking if you want to create a new record for the refund.

-
Click Yes.
The Refund dialog box updates with unapplied payment information.
-
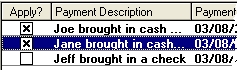
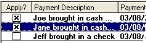
In list of invoices, in the Apply? column, indicate which payments to apply the refund to.
- Below the list of payments, in Description, enter text that describes the refund.
- In Type, enter the code describing the type of refund made, or click the lookup button and use the dialog box that appears to select the refund type.
- (If issuing the refund with a check) In Check No., enter the number on the refund check.
- (If issuing the refund to a credit card) In Authorization No., enter the authorization code issued for credit card transactions.
-
Depending on what you want to do, continue with one of the following.
To do this See instructions in Add notes
Add custom data fields (user-defined fields)
Add data in user-defined fields
Add attachments and
signatures -
Click Save.
The fields in the Refund dialog box clear so that you can issue another payment, if needed.
-
Click Close.
The refund appears on the Payments/Refunds tab.
- In the Account dialog box, click Close.