Configure general FH CAD Monitor
Before configuring
-
(If you selected Run as a Service during installation) Stop the
Information on stopping the
-
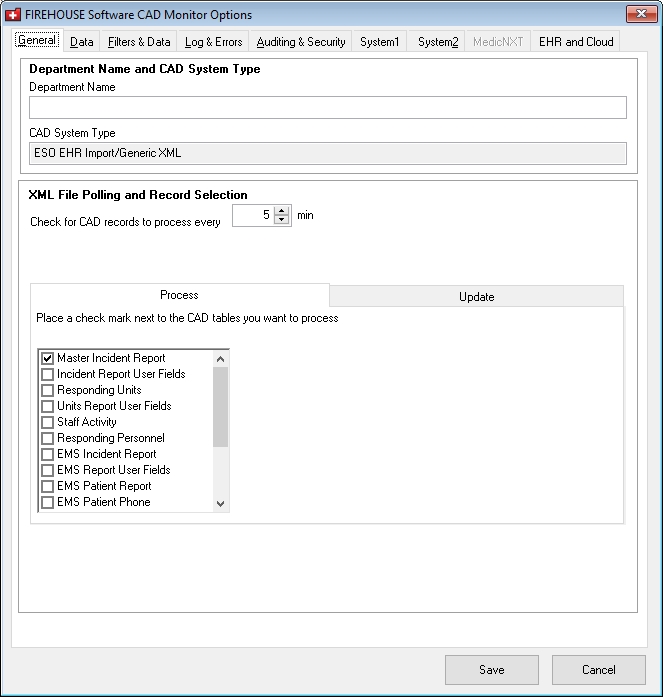
At the bottom of the FIREHOUSE Software CAD Monitor window, click Options.
The FIREHOUSE Software CAD Monitor Options dialog box appears, displaying the General tab.
Note: Different sections and options appear on this tab, depending on the
-
In Department Name, type the name of your fire department.
CAD System Type identifies the CAD system FH CAD Monitor is integrated with.
-
Under CAD Polling and Record Selection or XML File Polling and Record Selection, do the following for the fields that appear.
Note: The name of the section and the options that appear in it vary, depending on the type of
 Check for CAD records to process every ___ min
-
Type the frequency at which polling of the CAD system should occur for new data.
Check for -
Type the frequency at which polling of the
Reset Last Poll
-
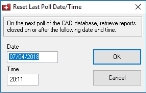
Click Reset Last Poll.
The Reset Last Poll Date/Time dialog box appears.
-
In Date and Time, specify the date and time CAD records should be closed on.
If the date and time the incident was closed is later than the date and time you specify in the dialog box, the record from the CAD system is skipped.
- Click OK.
Set/Reset polling timer at end of processing (standard) and
Set/Reset polling timer at beginning of processing-
Select one of these options to reset the date and time at which the last poll occurred.
The elapsed time between the start of the initial processing and the start of next processing will be as you select, plus the amount of time required to process.
Note: To reset the timer (for example, to synchronize with a CAD process), click Resume in FIREHOUSE Software
Query Entire DB (Standard) and Query from start of last poll
- Select one of these options to specify whether to check for new records from Printrak since the last time FH CAD Monitor checked, or whether to check through all available Printrack records, regardless of date or time.
Update incident continuously Update Incident based on incident insert, update and close times
-
Select or clear the option to indicate whether incident records that have already been imported into FIREHOUSE Software should be automatically updated with new data from the CAD system.
Depending on what CAD system FH CAD Monitor is integrated with, this update occurs at different times.
- Printrack Motorola CAD system: the incident data updates every time an update to the unit occurs.
- Motorola PremierOne CAD system: the incident data updated based on the incident insert, update, and close times.
Process and Update sub-tabs
-
On the Process sub-tab, select the tables in FIREHOUSE Software that you want to import data into from the
Note: The list of tables or record types that can appear varies based on the
Because FIREHOUSE Software records for the selected options are created for every
Information on adding data filters is available in Define CAD data filters.
Note: If you selected Generic ASCII Text files, tables containing user fields are not included unless the user field definition file is also included in the folder containing the CAD export files.
-
(Printrack Motorola Premier CAD) On the Process tab, in PrinTrak DB Agency Code, type the identification code for the agency in the PrinTrak database.
This code is needed for creating mutual aid records.
-
Click the Update sub-tab, and then select the
The same list of options as were listed on the Process sub-tab appear on the Update sub-tab.
- Select the
Delete records from the CAD database after import
-
Select or clear the option to indicate whether or not the CAD records are needed after they are added to the FIREHOUSE Software database.
If you select it, a menu to the right activates.
- (Printrack Motorola Premier CAD, Positron PowerCAD, Tiburon CAD, Generic Oracle) (If you selected the option) From the menu, choose the option that indicates which records you want to delete after the import.
Delete records from the CAD database after import, older than ___ days
-
Select or clear the option to indicate whether or not CAD records older than a specific number of days are deleted from the Printrack Motorola database.
If you select it, the number field to the right activates.
- (If you selected the option) For the number field, specify the maximum number of days the CAD records should be retained.
-
-
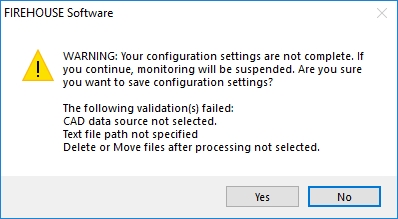
Click Save.
An information dialog box stating that configuration settings are not complete appears. This is normal at this point during configuration process.

- Click Yes.
- Continue with Configure database options.