Add shifts to a schedule with the wizard
Once you create a schedule, you need to add shifts to it. If you are adding multiple shifts to a schedule, using a wizard is faster than adding the shifts manually.
Note: If you only need to add a single shift, it may be faster to add the shift manually.
Information on creating a schedule is available in Add a new schedule. Information on manually adding a shift to the schedule is available in Add a shift to a schedule.
-
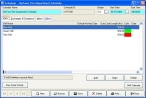
Choose File → Staff Scheduling → Add or Update Scheduling Definitions.
The Schedule dialog box appears.
-
Click Browse.
The Query - Schedules by Name dialog box appears.
-
Select a schedule, and then click OK.
The Schedule dialog box populates with information.
-
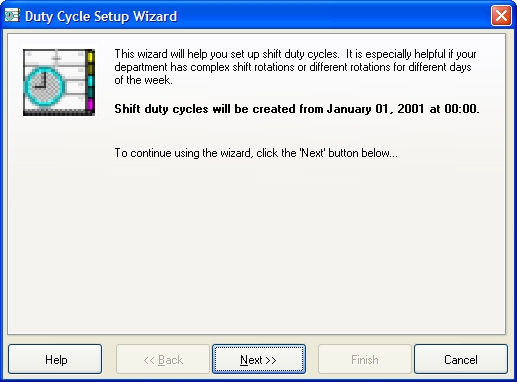
In the lower left corner of the dialog box, click Duty Cycle Wizard.
The Duty Cycle Setup Wizard appears.

-
Click Next >.
The next screen of the wizard appears.

-
Click New Shift.
The Schedule Shift dialog box appears.
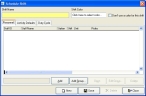
- In Shift Name, type a name for the shift you are adding.
-
Fill out the remaining fields in the dialog box, as described in Add a shift to a schedule, starting at step 6.
-
In the Schedule Shift dialog box, click Save, and then click Close.
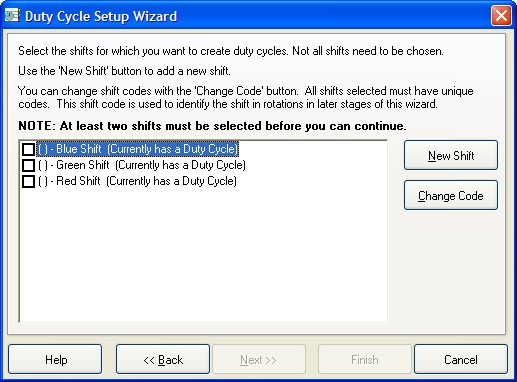
The shifts are listed in the Duty Cycle Setup Wizard in the following format:
(shift code) Shift Name (duty cycle status)
When you filled out the information in the Schedule Shift dialog box, if you specified a value on the Activity Defaults tab, in the Activity Code field, that value appears between the shift code parentheses in the Duty Cycle Setup Wizard. Shift code defines the shift rotation.
When you filled out the information in the Schedule Shift dialog box, if you specified a value on the Duty Cycle tab, the message
Currently has a Duty Cycleappears in the duty cycle status parentheses.Example:

-
Repeat steps 6-9 for any additional shifts you want to add to the schedule.
-
 (If a shift does not have a value in the shift code parentheses) Do the following.
-
Select (highlight) the shift name, and then click Change Code.
The Enter a Value dialog box appears.
- Enter a shift rotation value, and then click OK.
-
-
In the wizard, select two or more of the shifts listed.
Caution: A shift is selected only when a checkmark appears in the box in front of the shift code. Highlighting a shift does not select it.
Example:
Selected:
Not selected:
Note: Duty cycle information changes only for the selected shifts.
Caution: All selected shifts must have a value in the the shift code parentheses. If a selected shift has a value in the duty cycle status parentheses, that duty cycle information is overwritten.
-
Click Next >.
The next screen of the wizard appears.
-
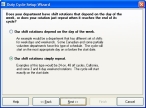
Depending on what kind of shift rotations you need, do one of the following.
Shifts
always occur on specific days of the week
- Select Our shift rotations depend on the day of the week.
-
Click Next >.
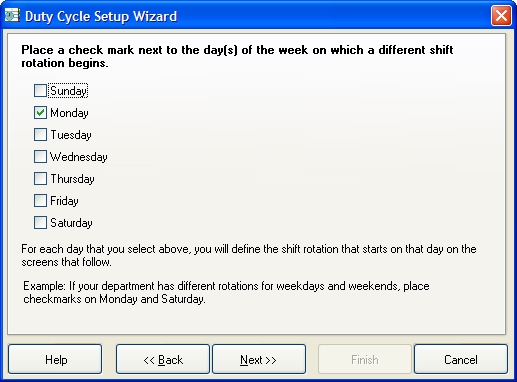
The next screen of the wizard appears, for defining the days shifts start on appears.

-
Select each day that a new shift starts, and then click Next >.
The next screen of the wizard appears for defining the shift, starting on the first checked day and ending on the day before the next checked day.
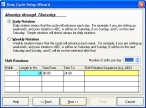
Note: If only one day is selected, the shift spans the entire week starting on the checked day.
-
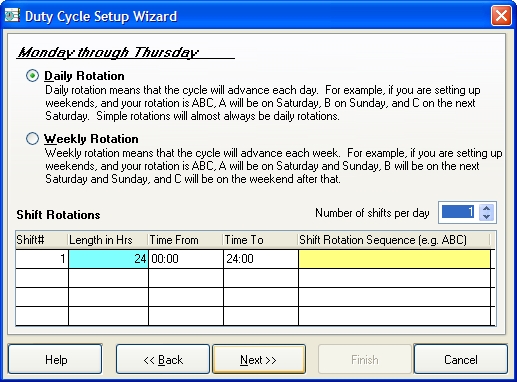
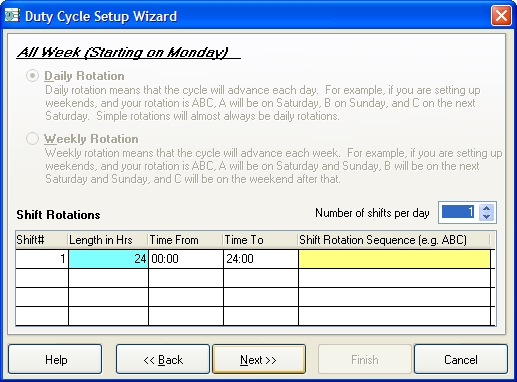
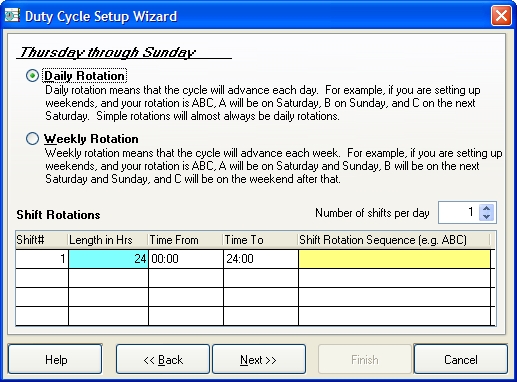
Choose one of the following.
If the shift is Select this One day Daily Rotation Multiple days, and the shift advances each day sequentially Daily Rotation A range of days, then advances the next week Weekly Rotation
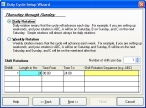
Shifts depend on the day of the week
- Select Our shift rotations simply repeat.
-
Click Next >.
The next screen of the wizard appears, with only the Shift Rotations section of the screen active.
-
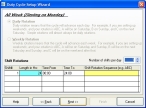
In Number of shifts per day, specify the number of shifts in a 24-hour period.
Note: Four is the maximum number of shifts you can specify. Shift rotation information changes based on the number of shifts you specify.
- (If necessary) In the first row, click in the Shift column, and then change the value to indicate the order a specific shift occurs in.
-
In the first row, click in the Length in Hrs column, and then type the duration of the shift.
The times (on a 24-hour clock) in the Time From and Time To columns update automatically, based on the value you enter in Length in Hrs.
-
In the first row, click in the Shift Rotation Sequence column and then type the shift code for that shift.
Tip: You specified the code for the shift in step 8 or 11.
- Repeat steps 16-18 for each shift, in their respective rows under Shift Rotations.
-
Click Next >.
In step 14, if you decided that shifts always occur on specific days of the week, and if you selected more than one day of the week defining the days shifts start, the next screen of the wizard that appears lets you define the shift rotation, starting on the next checked day and ending on the day before the next checked day in the list.
- (If another screen for defining a shift rotation appears) Repeat steps 15-19.
-
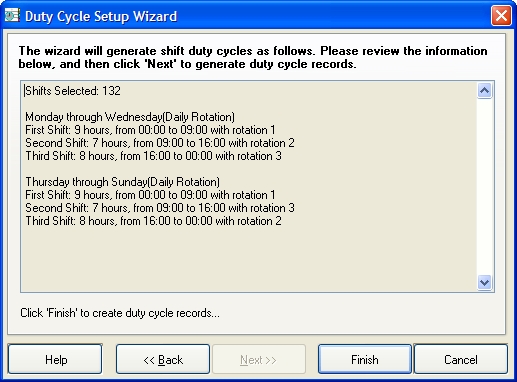
Click Next >.
The last screen of the wizard appears, summarizing the information you specified for the shifts and their rotations.
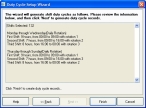
-
Click Finish.
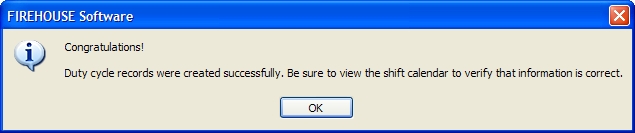
A confirmation appears, indicating that duty cycle records were created.
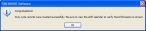
- Click OK.