Install FH Enterprise on a client computer
You must install FH Enterprise on each client computer that will run FH Enterprise. If a computer does not have enough free disk space, the installation will not complete.
|
Caution:
|
- (If you have not done so already) Log on to the computer you want to install the FH Enterprise client onto as an administrator.
-
 (Windows Server 2008 or later, if Citrix or Terminal Services are installed) Place the computer in installation mode.
-
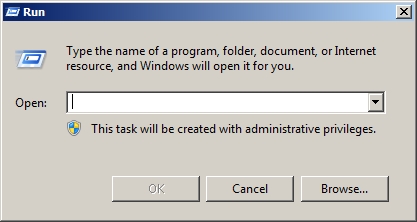
Choose Start → Run.
The Run dialog box appears.
-
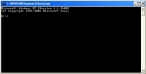
In Open, type
cmd.A Windows system dialog box appears with a command prompt.
-
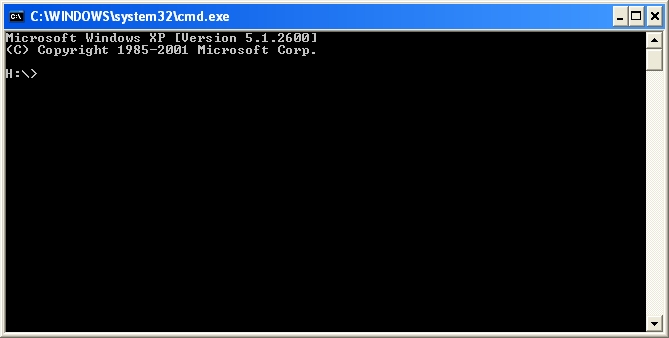
At the prompt, type
change user /install.A message appears confirming that the server is now set to installation mode.
- Close the Windows system dialog box.
-
-
Depending on where you are installing the FH Enterprise client, do one of the following.
- (On the SQL database server, and if the FH Enterprise installation or update dialog box is still open) Go to step 4.
-
(On a different computer, or if you closed the FH Enterprise installation or update dialog box on the database server) Do the following.
- (If you have not done so already) Follow the directions in the email to download and unzip the necessary files and folders.
- Navigate into the folder of unzipped contents.
-
Double-click
AutoRun.exe.The FH Enterprise installation or update dialog box dialog box appears.
-
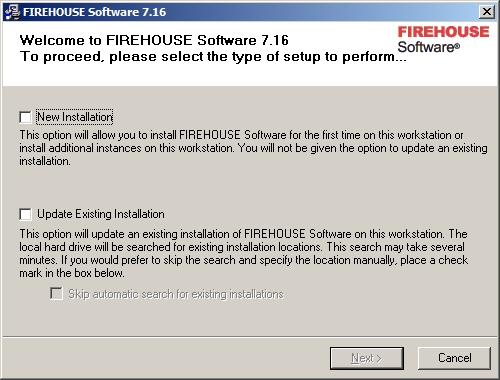
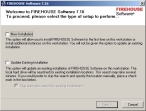
In the FH Enterprise installation or update dialog box, click Install or Update the FIREHOUSE Software Enterprise Client (Workstation).
The Welcome screen of the wizard appears.
-
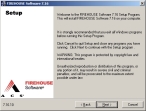
Select New Installation, and then click Next >.
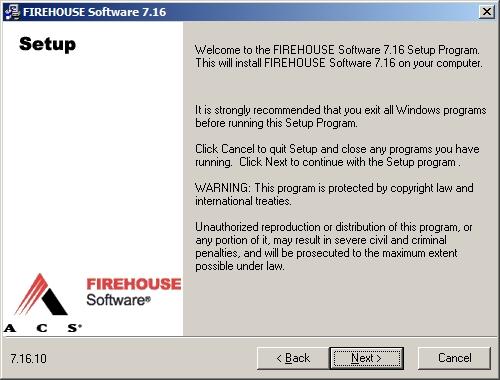
The Setup screen of the wizard appears.
-
Read the information on the screen, and then click Next >.
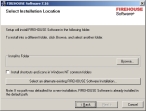
The Select Installation Location screen of the wizard appears.
-
(Optional) In Install to Folder, click Browse and use the file browser that appears to navigate to the directory where you want to install FH.
Warning: For Windows 2008, and higher computers, this location must be outside the
C:\Program FilesandC:\WINDOWSdirectories. - Select Install Shortcuts and icons in Windows NT common folders so that all users logging into this computer can see the FH Enterprise icons.
-
Click Next >.
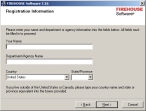
The Registration Information screen of the wizard appears.
-
Fill in this screen as appropriate to your company and location, and then click Next >.
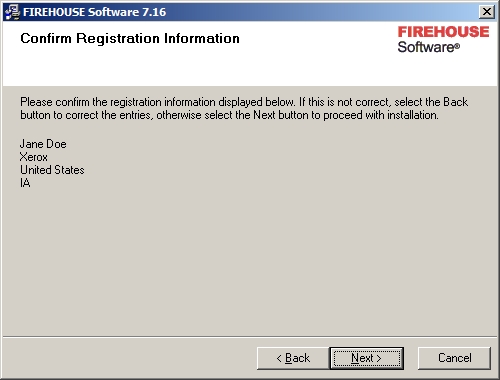
The Confirm Registration Information screen of the wizard appears.

-
Check the information on this screen, and then click Next >.
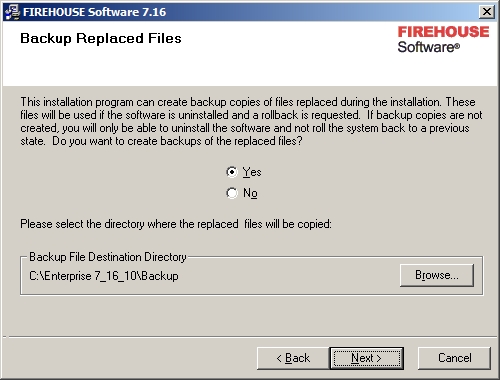
The Backup Replaced Files screen of the wizard appears.
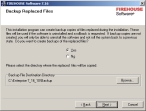
- For a new installation, select No, because there are no files to back up yet.
- (Optional) Click Browse and then navigate to the directory where you want to place files.
-
Click Next >.
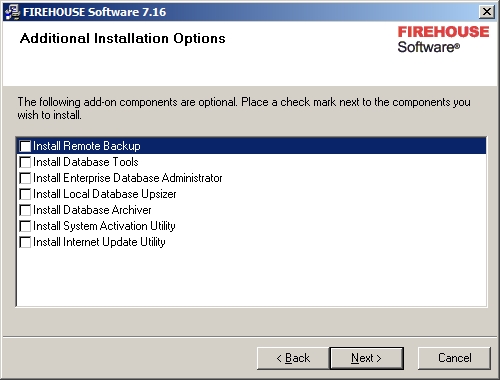
The Additional Installation Options screen of the wizard appears.
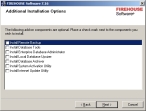
Caution: The additional options are for administrators, and should not be installed unless an administrator will be using these tools at this client computer.
-
(If necessary) Select the options for an administrator to use at this client computer.
Select this For an administrator to do this Install Remote Backup
Create database backups.
Caution: Not recommended for computers used by non-administrative personnel, and only recommended for the SQL database server.
Install Database Tools
Perform database maintenance. Recommended for all computers.
Install Enterprise
Database AdministratorAdminister SQL Server databases.
Caution: Not recommended for workstations used by non-administrative personnel, and only recommended for the SQL database server.
Install Local
Database UpsizerUpsize a standard FH database.
Caution: Only recommended for installation on the SQL database server.
Warning: If you want to upsize an existing FH Standard database to a SQL database that works with FH Enterprise, you must select this option on the first computer you install the FH Enterprise client on. You do not need to install it on other client computers.
Install Database Archiver
Create database archives.
Caution: Recommended for the server only.
Install System
Activation UtilityActivate an evaluation system. Recommended for all computers. Install Internet
Update UtilityWarning: This option is not operational. Do not use it.
-
Click Next >.
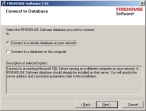
The Connect to Database screen of the wizard appears.
-
Depending on the location of the database, select the appropriate option, and then click Next >.
If FH Enterprise is located on Select this A server on your network, not on the computer you are currently on.
Connect to a remote database on your
networkThis computer.
Connect to a database on this computer
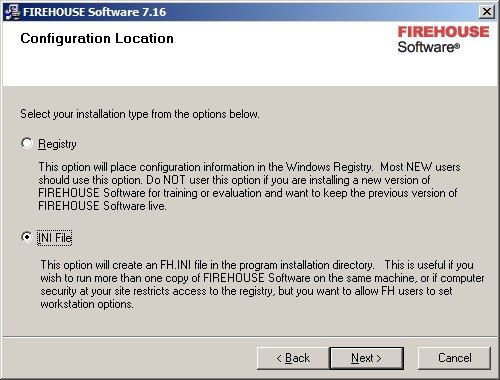
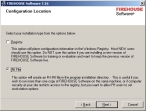
The Configuration Location screen of the wizard appears.
-
Verify that INI File is selected.
Configuration will be saved in the program installation directory.
Warning: Do not select Registry for Windows Server 2008 or Windows Server 2008 R2.
-
Click Next >.
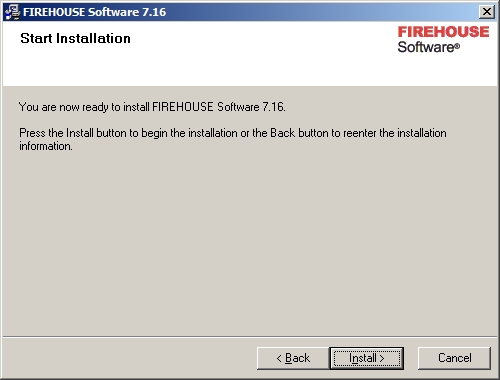
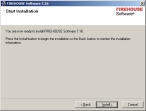
The Start Installation screen of the installation wizard appears.
-
Click Install.
The Installing screen appears, and progress bars appear in the wizard.
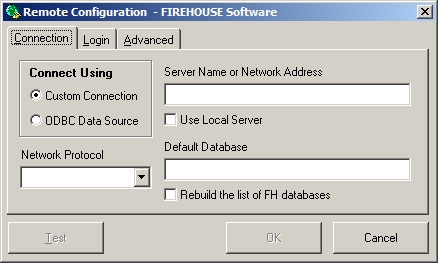
When the installation completes, the installation wizard disappears and the Remote Configuration dialog box appears, set to the Connection tab.
When a user logs into FH Enterprise with their FH username and password, the client computer automatically tries to connect to the SQL database for FH on the SQL database server. You need to specify the network protocol, the location of the FH database, and the SQL Server administrator username and password, and other parameters for this connection to be successful.
Tip: If necessary, you can access this dialog box after installing FH Enterprise on a client computer by choosing Start → FIREHOUSE Software → FIREHOUSE Software Enterprise Edition Tools → Remote Connection Configuration.
-
Do one of the following.
(New installation or additional client computers) Connect to a SQL database
- Continue with step 22 below.
Upsize from FH Standard to FH Enterprise
If this is the first client computer you have installed the FH Enterprise on, then your FH Standard database is still in its FoxPro format, and cannot be connected yet to FH Enterprise. Later, after you run the Local Database Upsizer utility you selected for installation earlier in step 15, you will connect the upsized database to FH Enterprise.
Warning: You only want to upsize the FH Standard database once. If you have already run the Local Database Upsizer utility on the first client computer, do not run it again on other client computers. Instead, connect to the SQL database that was created when the utility was run on the first client computer.
-
Click Cancel.
The Remote Configuration dialog box disappears, and the installation wizard reappears, displaying the Installation Complete screen.
- Skip step 22 and continue with step 23 below.
-
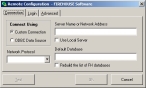
In the Remote Configuration dialog box, do the following.
-
Under Connect Using, select a method to connect the client computer to the server.
Custom Connection is the default method for connecting an FH Enterprise client to the server. ODBC Data Source is useful if you encounter connection errors and if you have the ability to set up an ODBC (Open Database Connectivity) user data source that contains details about the client connection to the server.
Note: ODBC data sources are set up outside FH Enterprise.
If you select this Do this Custom
Connection-
From Network Protocol, select Winsock Netlib.
Named Pipes is not recommended for low-bandwidth connections.
Note: TCP/IP is a common network protocol for wide area networks, but is not available with the newest Microsoft Data Access Components (MDAC). It is, however, supported in Winsock Netlib.
Caution: Both the server and client need to have the selected network protocol enabled for the connection to be valid.
-
Depending on the location of the FH Enterprise database, do one of the following.
Database is on a server on the network
- In Server Name or Network Address, server name/address of the database server.
Database is also on the client computer
-
Select Use Local Server.
Note: This option should only be used if SQL is using the default instance name. If a named instance of SQL is used, you must specify that.
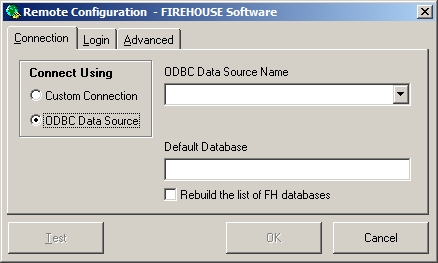
ODBC Data Source
Note: When you select ODBC Data Source, the user interface in the Remote Configuration dialog box changes on the Connection tab.
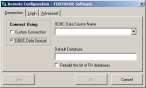
- From ODBC Data Source Name, select an ODBC data source.
-
- In Default Database, type the name of the database you selected earlier (fh, fh_demo, or the database name you specified earlier).
-
(If you have multiple SQL databases for FH Enterprise on the database server) Select Rebuild the list of FH databases to include all FH Enterprise databases in the list of databases you can connect to when logging into FH Enterprise.
-
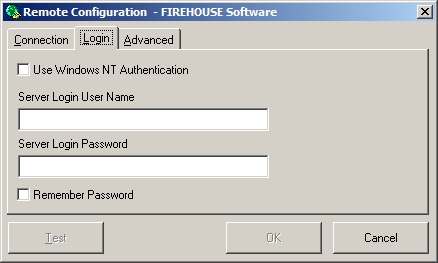
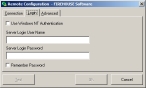
Click the Login tab.
-
Define your SQL Server login credentials in one of the following ways.
Use the current or active Windows user account login credentials
-
Select Use Windows NT Authentication.
Note: This option is only available for Windows networks, and the logged-in user must have an SQL security login added for their Windows login.
Example:
advsetup@sqlserv
Unique SQL Server login credentials
- (If it is selected) Clear Use Windows NT Authentication.
-
In Server Login User Name and Server Login Password, enter the user name and password for SQL Server.
-
Select Remember Password to indicate that you want to automatically use the specified server user name and password.
If this option is not selected, you are prompted to supply this information each time you connect to SQL Server.
-
-
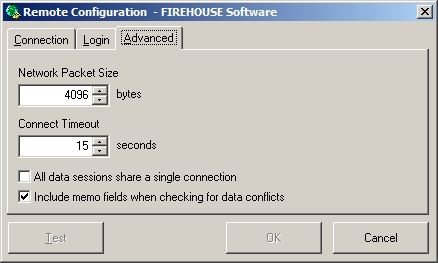
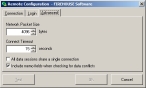
Click the Advanced tab.
-
In Network Packet Size, enter the size of data segments sent through your network between the client and database server.
The packet size 4096 is the default, but most networks can support a larger size.
-
In Connect Timeout, enter the number of seconds the client attempts to connect to the database server.
If the client computer is a longer distance from the database server, a longer timeout value may be needed.
-
Select All data sessions share a single connection to consolidate multiple connections to SQL Server to a single connection.
Note: Using a dedicated connection to SQL Server databases can increase performance for FH Enterprise.
- Clear Include memo fields when checking for data conflicts to prevent FH Enterprise from comparing updated text in the Notes tab of dialog boxes to the text which had existed before.
-
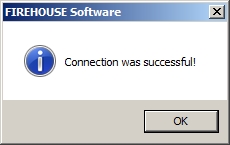
At the bottom of the dialog box, click Test.
A dialog box indicating confirmation or failure of the client's success at connecting with the FH Enterprise server appears.
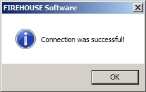
- Click OK.
-
In the Remote Configuration dialog box, click OK.
The Remote Configuration dialog box disappears, and the installation wizard reappears, displaying the Installation Complete screen.
-
-
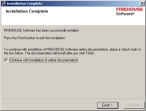
Click Finish.
The Documentation installation wizard appears.

-
Click Next >.
The location where the documentation will be installed appears.
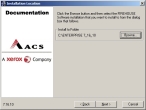
- (Optional) Click Browse and use the file browser that appears to navigate to the directory you want to install the documentation in.
-
Click Next >.
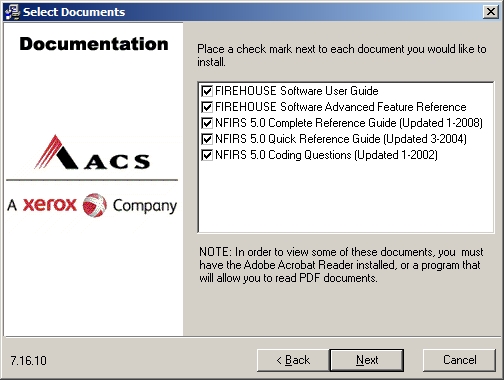
A list of the documentation you can install appears.
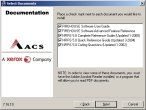
-
(Optional) Clear any documents you do not want to install, and then click Next >.
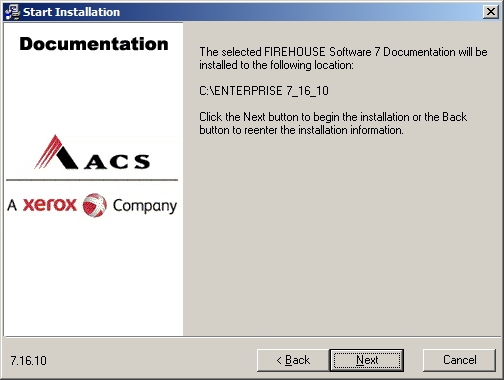
A confirmation screen appears.

-
Read the information on the screen, and then click Next >.
Another confirmation screen appears.
-
Click Finish >.
The Firehouse installation or update dialog box reappears.
Caution: If this is the first computer you have installed the FH Enterprise client on, do not close the FH Enterprise installation or update dialog box. You will need it to activate FH Enterprise or upsize an FH Standard database.
-
(Windows Server 2008 or later, if Citrix or Terminal Services are installed) Return the computer to application mode.
-
Choose Start → Run.
The Run dialog box appears.
-
In Open, type
cmd.A Windows system dialog box appears with a command prompt.
-
At the prompt, type
change user /execute.A message appears confirming that the server is now set to user mode.
- Close the Windows system dialog box.
-
-
Do one of the following.
If this is the first computer you have installed the FH Enterprise client on
-
Do one of the following.
If you are Do this Upsizing from FH Standard to FH Enterprise Continue with Upsize the FH Standard database. Installing a new
installation of FH EnterpriseContinue with Activate a new FH Enterprise installation.
If you are adding another client computer
-
Begin using FH Enterprise on the client computer as normal.
The licensing necessary for this client computer is automatically applied.
Tip: If the license is not applied automatically, copy the
fh.licfile in theRemotefolder from the first computer you installed the FH Enterprise client on, and paste it into theRemotefolder the computer you added.
-