Add a map view
You can create map views that specify what layers appear on the map, and save these views for fast access in the future. Layers can include icons, streets labels, landmarks, building footprints, location push-pins, routes and routing icons, plumes, and more.
More information on map views is available in Add, edit, and delete map views.
Note: You must have purchased FH Mobile Response Premium to add map views of information layers in FH Mobile Response. For information on upgrading from FH Mobile Response Basic to Premium, contact your FH sales representative.
-
Do one of the following.
 Start a new map view from the menu.
-
Choose Go → New → Administrative → Map View.
The View tab appears.

Start a new map view from the View Browser.
-
Do one of the following.
- Choose Go → Open → Administrative → Map Views.
- Choose Go → Map → Administrative → Map Views.
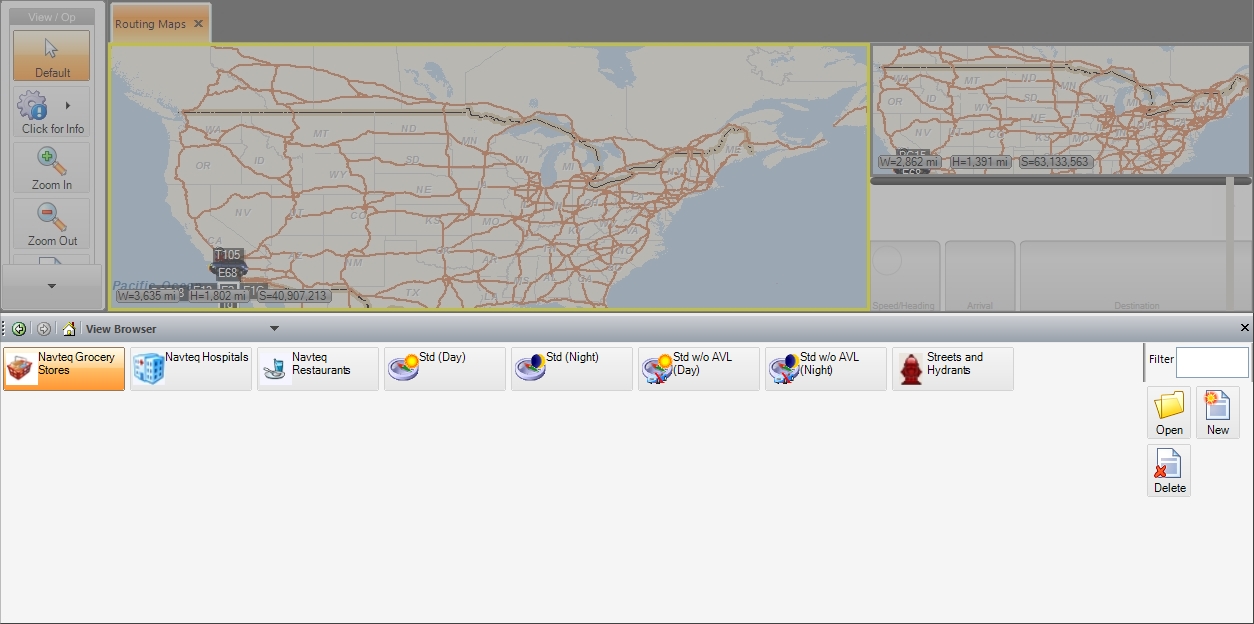
Across the bottom of the interface, the View Browser appears, listing all the map views currently defined.
-
On the right side of the View Browser, click New.
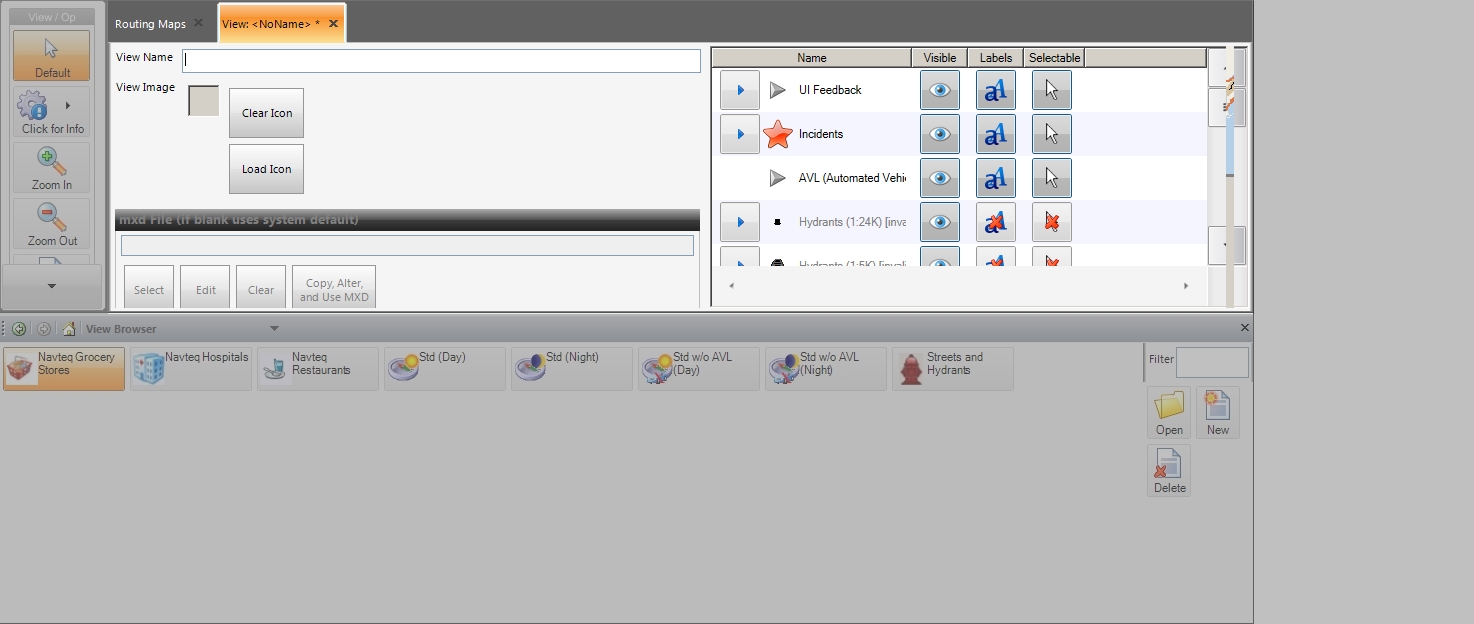
The View tab appears in the top half of the interface.
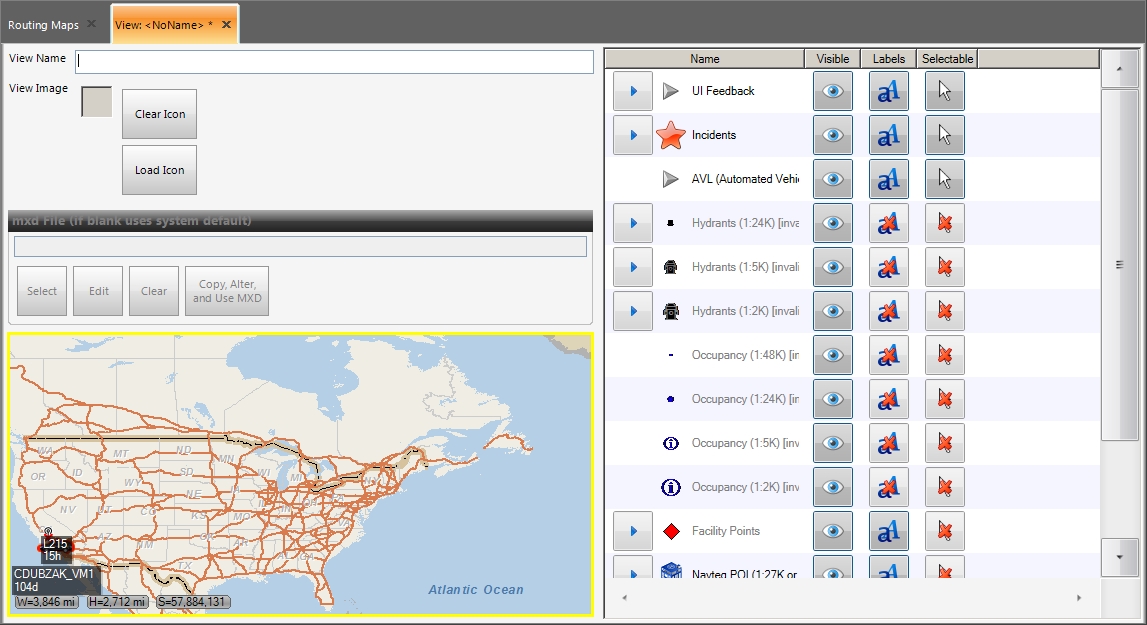
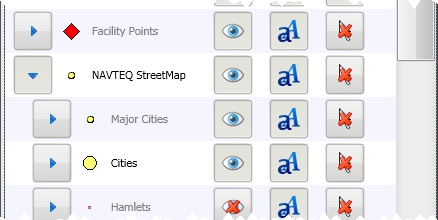
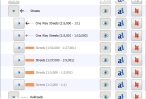
In the View tab, a list of icons indicating whether an element and its label are visible in the map view appears, and whether they are selectable with the mouse pointer.
Icon Indicates 
The layer is contracted in the Layer Manager pane, and sub-layers are not displayed.
Example:

The layer is expanded in the Layer Manager pane, and sub-layers are displayed.
Example:
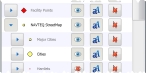

The graphical element representing the layer is visible on the map.
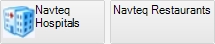
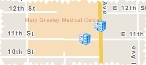
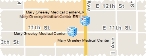
Example: For the NAVTEQ POI→ Navteq Hospital layer, hospital icons are visible on the map.

The graphical element representing the layer is not visible on the map.

The label for the layer is visible on the map.
Example: For the NAVTEQ POI → Navteq Hospital layer, hospital labels are visible on the map.

The label for the layer is not visible on the map.

The map elements for the layer can be selected on the map.

The map elements for the layer can not be selected on the map. -
-
Find the name of a layer you want to work with, and click the right-pointing arrow
 to the left of the name.
 The icon on the buttons changes to a down-pointing arrow
 and the layer expands, listing all the sub-layers in it.
Tip: You can collapse the listing of sub-layers by clicking the down-pointing arrow
to the left of the layer name. - (If necessary) Repeat the previous step for sub-layers, to expand the hierarchy further and view additional sub-layers.
-
For the layer of interest, do any of the following.
- Click the icon in the Visible column to enable or disable the display of the layer's geographical item icon on the selected map.
- Click the icon in the Labels column to enable or disable the display of the layer's geographical item label on the selected map.
- Click the icon in the Selectable column to enable or disable the ability to select the geographical item on the selected map.
Note: Settings on layers higher in the hierarchy supersede settings on the sub-layers.
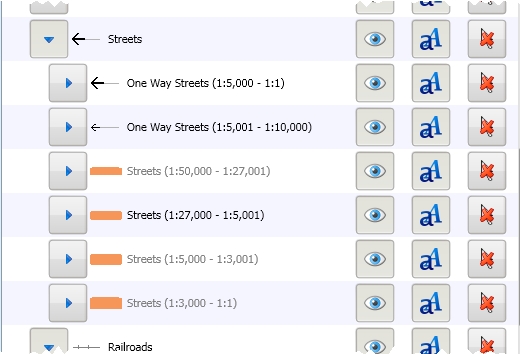
Example: Suppose that the icon in the Visible column for the NAVTEQ StreetMap layer is set to visible
 , that you have expanded the NAVTEQ StreetMap layer, and that you clicked the icons in the Visible column for the sub-layers, so that you have a mixture of visible and hidden geographical information on the selected map. If you then click the icon in the Visible column for the NAVTEQ StreetMap layer so that it is set to not-visible (hidden)
  , all of the sub-layers under NAVTEQ StreetMap disappear from the map (become hidden), regardless their individual visibility setting.
 -
(Optional) Drag the Name column further to the right, and observe the zoom distance behind layer and sub-layer names.
The scale range (zoom level) for each layer appears in parenthesis behind the layer name. Layers or sub-layers that are currently within the scale range are identified with black text, and their graphical elements appear on the map if the icon in the Visible column is set to visible
. Layers or sub-layers that are not currently within the scale range are identified with grey text, and their graphical elements do not appear on the map, even if the icon in the Visible column is set to visible
. -
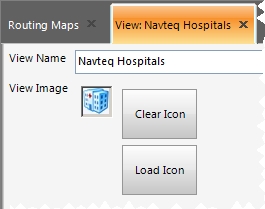
In View Name, type a descriptive label for the map view you are creating.
Example:
Navteq HospitalsThe View tab's name updates to include the name of the view you are creating.
-
Associate an image with the map view, to be used as the view's icon.
-
(Optional, outside of FH Mobile Response) Create a small image file to be used as an icon representing the map view you are creating.
Example: If you are creating a map view of streets and hydrants, you may want to use the image of a hydrant as an icon for the map view.
-
On the View tab, click Load Icon.
A file browser appears.
-
Navigate to the location where you saved the image file you want to use as the icon, and select it.
FH Mobile Response loads the image and displays a view of it as an icon.
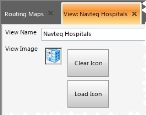
Tip: If you change your mind about using the displayed image as the icon, you can remove it from the map view you are creating by clicking Clear Icon.
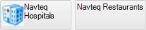
When you later choose Go → Tools → Map Commands → Set View and the Select View dialog box appears, the icon you associated with the map view appears on the button for accessing the map view. If you choose not to associate an icon with the map view, the view's button only lists the name of the view.
-
-
Choose Go → Save View to save your map view selections.
Note: The buttons under mxd file (if blank uses system default) are for a feature that is not yet available, and is in the user interface as a placeholder for development.