Set up incident activation
You can define the automated functionality that occurs each time an incident is activated.
Information on whether an incident is activated automatically or manually is available in Set up incident loading and notifications.
-
Choose Go → Config→ Options.
The Options dialog box appears, displaying the Server tab.
-
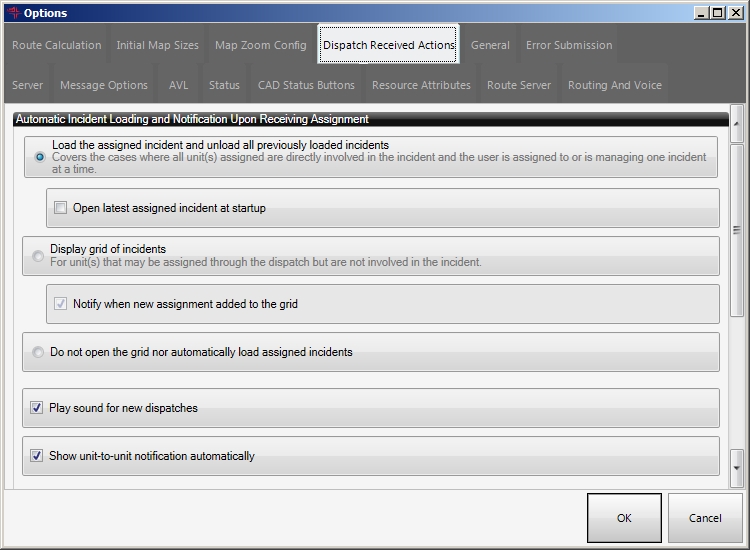
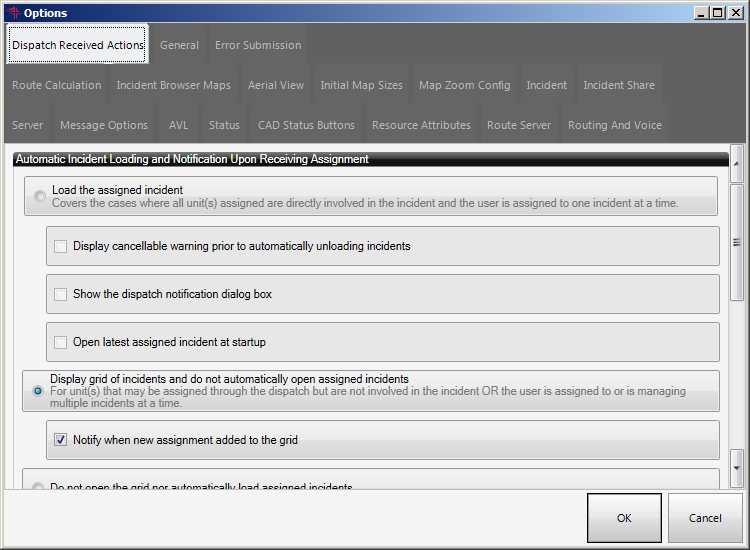
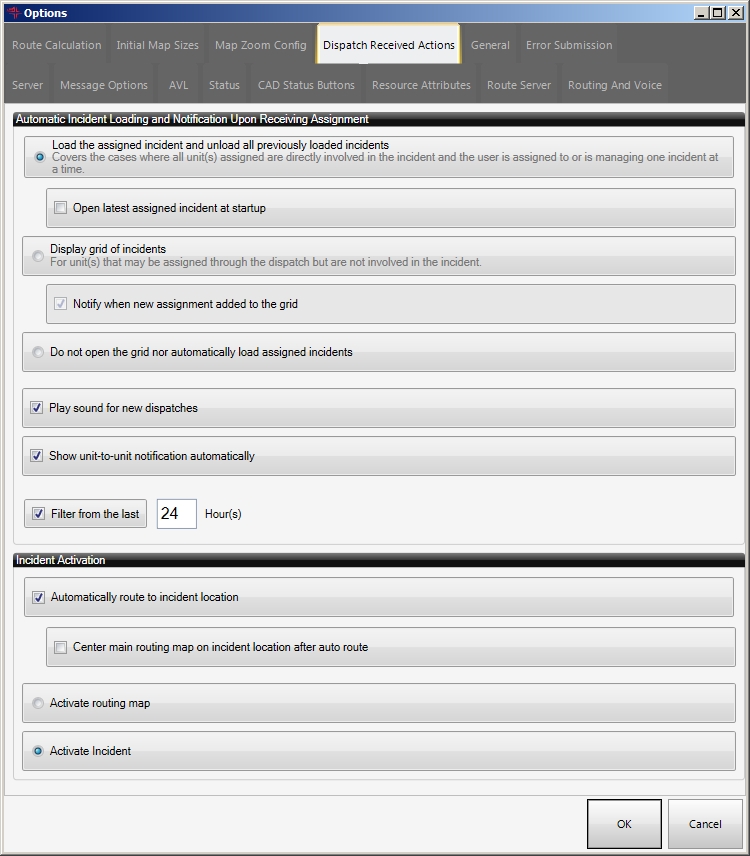
Click the Dispatch Received Actions tab.
Basic
Premium
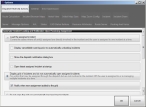
Note: To see all the options on this tab, drag the right side and bottom of the tab out to increase the size of the Options dialog box.
Basic
Premium
You can configure the Automatic Incident Loading and Notification Upon Receiving Assignment section of the tab to match the public safety environment that the unit is deployed in.
-
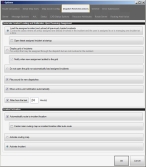
Select or clear Automatically route to incident location to indicate whether or not FH Mobile Response calculates the optimal route as soon as the incident activates.
Note: Other routes may be presented as well as the optimal route.
Even if the routing page is not foremost and Activate routing map is not selected, FH Mobile Response provides audible turn-by-turn directions.
-
(If you selected Automatically route to incident location) Select or clear Center main routing map on incident location after auto route to indicate whether or not FH Mobile Response automatically centers the main routing map on the incident location .
If selected, when the incident is dispatched and activated and the operator accesses the Routing Maps tab, the main map centers on the incident location.
-
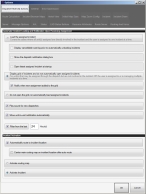
Depending on the operator's first priority upon dispatch, select one of the following.
First priority is this Do this Obtain driving directions to the incident site. - Choose Activate routing map.
View an incident description. - Choose Activate Incident.
- Click OK.