Set up incident loading and notifications
You can determine how an FH Mobile Response field unit responds to dispatch assignments. The options you select are performed each time a new incident is dispatched to the assigned unit ID.
-
Choose Go → Config→ Options.
The Options dialog box appears, displaying the Server tab.
-
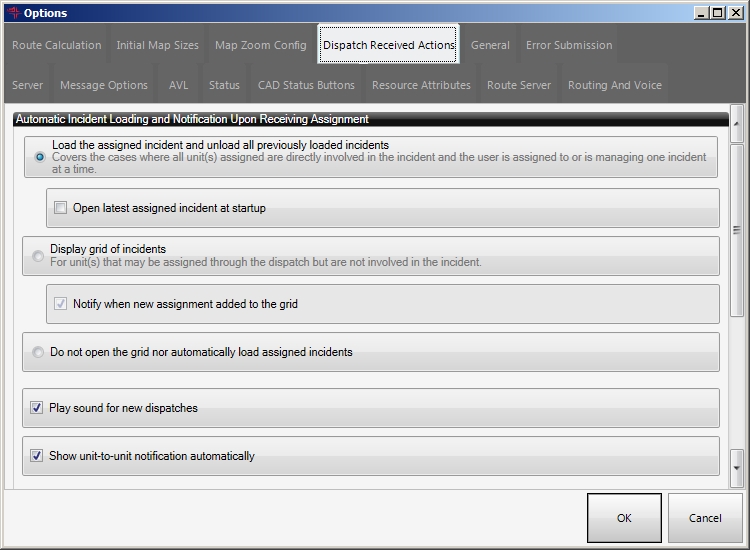
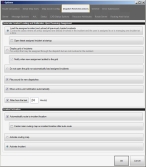
Click the Dispatch Received Actions tab.
Basic
Premium
Note: To see all the options on this tab, drag the right side and bottom of the tab out to increase the size of the Options dialog box.
Basic
Premium
You can configure the Automatic Incident Loading and Notification Upon Receiving Assignment section of the tab to match the public safety environment that the unit is deployed in.
-
Depending on the public safety environment that the unit is deployed in, do one of the following.
 Load the assigned incident
-
Select the Load the assigned incident and unload all previously loaded incidents to automatically load and activate each new incident as it is assigned.
This option is ideal when all units assigned are directly involved in the incident, and you are assigned to or are managing only one incident at a time.
If your CAD system and the FH Mobile Response server have absolute control over each unit, then choose this option.
Open latest assigned incident at startup activates.
-
Select or clear Open latest assigned incident at startup to indicate whether or not the last-assigned incident automatically loads at program startup, unless it was closed by the CAD system (and this information was communicated to the FH Mobile Response client).
Note: This feature can be very important in the event that computer or operating system shuts down unexpectedly. When restarted, FH Mobile Response automatically reloads the last incident.
Caution: If the CAD system does not properly communicate when an incident is closed, then each time FH Mobile Response is started, it may load an old incident. In this case it is best to leave this option cleared.
Display a grid of incidents, and do not automatically open assigned incidents
-
Select Display grid of incidents.
This option is ideal for units that may be assigned through the CAD system, but which are not involved in the incident. It is also good for environments where the CAD system does not have complete control over each unit, appliance, and vehicle. Dispatches may be sent out to stations from which responders go out on calls based on crew availability and/or equipment suitability.
Notify when new assignment added to the grid activates.
-
Select or clear Notify when new assignment added to the grid to indicate whether or not to display a list of new incidents.
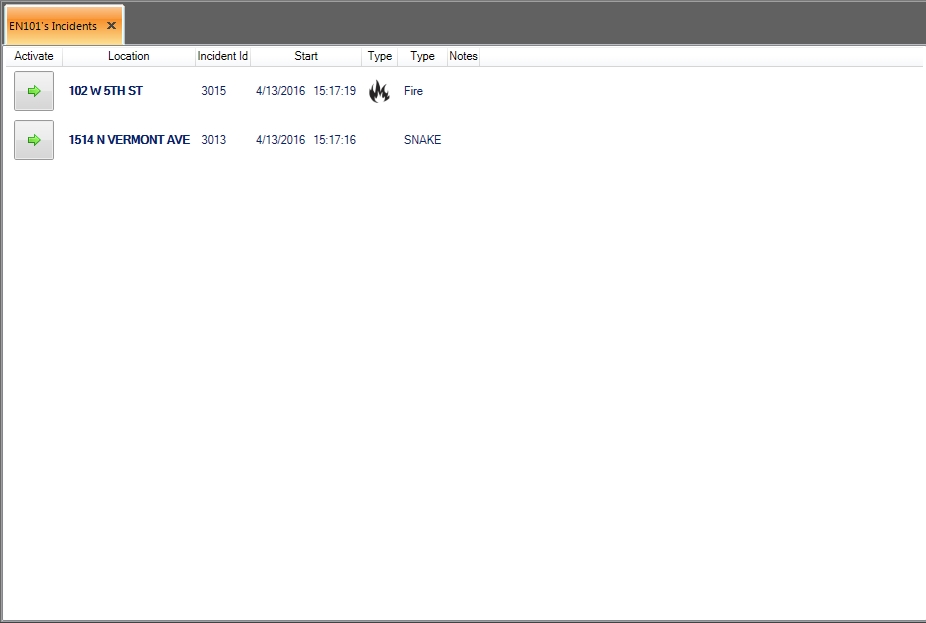
When this option is selected, when a new incident from a CAD system arrives, the Incidents tab for that user appears, listing information about the incidents assigned to the user in a table (grid) format.
Do not open the grid, or automatically load assigned incidents
-
Select Do not open the grid nor automatically load assigned incidents to prevent automatic functions related to the incident.
This option is ideal when the unit, appliance, or vehicle may be assigned to incidents, but the operator does not want the system to automatically perform any functions with that incident.
Example: By policy, a battalion chief may be assigned to every incident within a region. If the chief is using FH Mobile Response Command Post, he may already know what incidents are active through his Incident Browser screen, and will not need notification.
For information on upgrading to FH Mobile Response Command Post, contact your FH sales representative.
-
-
Depending on the public safety environment that the unit is deployed in, do one of the following.
Load the assigned incident
-
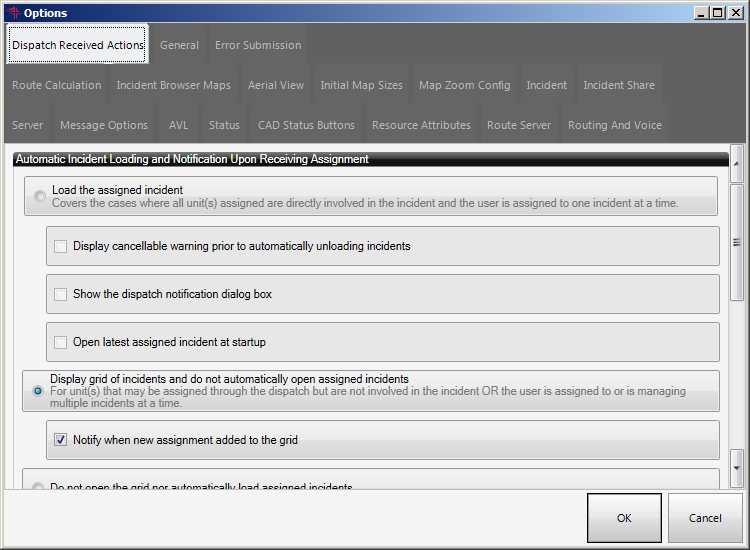
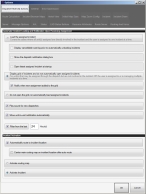
Depending on whether you are using FH Mobile Response Basic or Premium, do one of the following.
Basic
-
Select the Load the assigned incident and unload all previously loaded incidents to automatically unload the current incident and load and activate a new incident as it is assigned.
This option is ideal when all units assigned are directly involved in the incident, and you are assigned to or are managing only one incident at a time.
If your CAD system and the FH Mobile Response server have absolute control over each unit, then choose this option.
Open latest assigned incident at startup activates.
-
Select or clear Open latest assigned incident at startup to indicate whether or not the last-assigned incident automatically loads at program startup, unless it was closed by the CAD system (and this information was communicated to the FH Mobile Response client).
Note: This feature can be very important in the event that computer or operating system shuts down unexpectedly. When restarted, FH Mobile Response automatically reloads the last incident.
Caution: If the CAD system does not properly communicate when an incident is closed, then each time FH Mobile Response is started, it may load an old incident. In this case it is best to leave this option cleared.
Premium
-
Select the Load the assigned incident to automatically load and activate each new incident as it is assigned.
This option is ideal when all units assigned are directly involved in the incident, and you are assigned to only one incident at a time.
If your CAD system and the FH Mobile Response server have absolute control over each unit, then choose this option.
-
Select or clear the following options to control what happens when an assigned incident loads in FH Mobile Response.
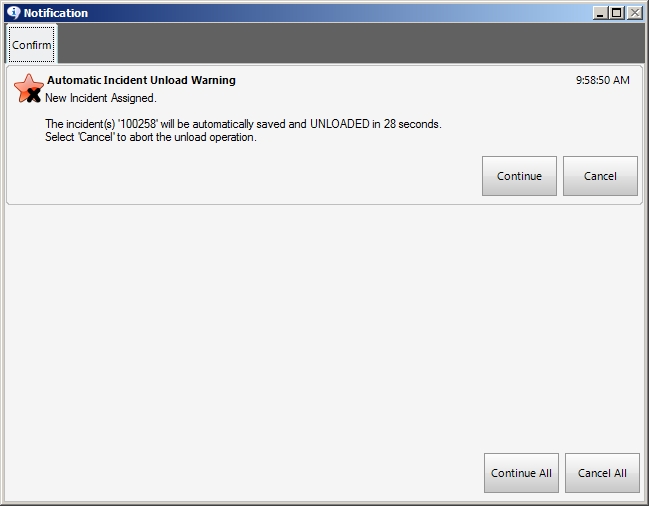
Select this To do this Display cancellable warning prior to automatically unloading incidents
(If an incident has already been activated, loaded, and has not been closed)
Display a Notification dialog box with a 30-second warning to cancel the automatic unloading of the current incident before the new incident is loaded and displayed.
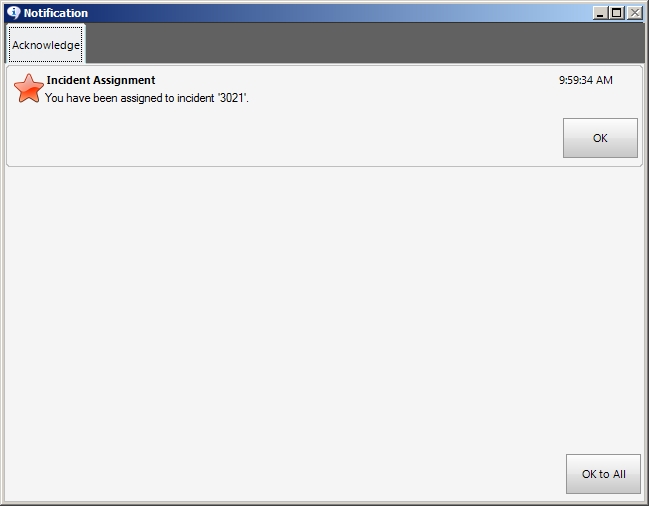
Show the dispatch notification dialog box
Display a Notification dialog box for every incident dispatched to the apparatus.
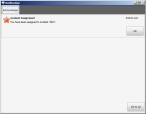
This feature is useful if the apparatus is not always manned when dispatches go out. When the apparatus is first manned., it is easy to see whether the incident on the terminal is old, or if it is the current dispatch.
Note: If the operator has a good sense of every dispatch that is sent to the vehicle, you should clear this option to disable the notifications.
Open latest assigned incident at startup
Indicate that the last-assigned incident automatically loads at program start-up, unless it was closed by the CAD system (and this information was communicated to the FH Mobile Response client).
Note: This feature can be very important in the event that computer or operating system shuts down unexpectedly. When restarted, FH Mobile Response automatically reloads the last incident.
Caution: If the CAD system does not properly communicate when an incident is closed, then each time FH Mobile Response is started, it may load an old incident. In this case it is best to leave this option cleared.
-
Display a grid of incidents, and do not automatically open assigned incidents
-
Depending on whether you are using FH Mobile Response Basic or Premium, do one of the following.
Basic
-
Select Display grid of incidents.
The station decides what units to send, not the CAD system. This is good for environments where the CAD system does not have complete control over each unit, appliance, and vehicle. Dispatches may be sent out to stations from which responders go out on calls based on crew availability and/or equipment suitability.
Notify when new assignment added to the grid activates.
Premium
-
Select Display grid of incidents and do not automatically open assigned incidents.
This option is ideal for users assigned to or managing multiple incidents at one time.
The station decides what units to send, not the CAD system. It is good for environments where the CAD system does not have complete control over each unit, appliance, and vehicle. Dispatches may be sent out to stations from which responders go out on calls based on crew availability and/or equipment suitability.
When this option is selected, FH Mobile Response adds each new incident to a list that opens (if it is not already being displayed).
-
-
Select or clear Notify when new assignment added to the grid to indicate whether or not to display a list of new incidents.
When this option is selected, when a new incident from a CAD system arrives, the Incidents tab for that user appears, listing information about the incidents assigned to the user in a table (grid) format.
Do not open the grid, or automatically load assigned incidents
-
Select Do not open the grid nor automatically load assigned incidents to prevent automatic functions related to the incident.
This option is ideal when the unit, appliance, or vehicle may be assigned to incidents, but the operator does not want the system to automatically perform any functions with that incident.
Example: By policy, a battalion chief may be assigned to every incident within a region. If the chief is using FH Mobile Response Command Post, he may already know what incidents are active through his Incident Browser screen, and will not need notification.
For information on upgrading to FH Mobile Response Command Post, contact your FH sales representative.
-
-
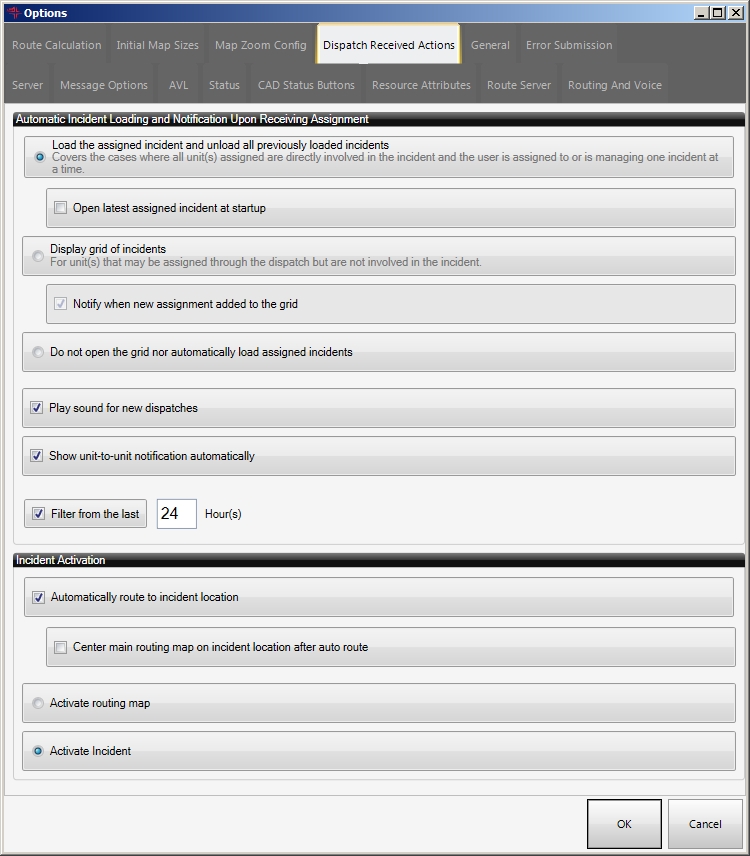
Select or clear Play sound for new dispatches to indicate whether or not you want to hear a sound for every new dispatch issued to the signed-in unit ID.
If selected, the sound plays regardless of its activation status or what incident loading and notification option you selected.
-
Select or clear Show unit-to-unit notification automatically to indicate whether or not to automatically display received dispatches.
Note: This option is designed for older installations of FH Mobile Response that use FH Mobile Response's ability to dispatch from the Command Post.
-
Select or clear Filter from the last to indicate whether or not to limit the incidents displayed on the grid to those that were started within a specified number of hours.
The grid displayed is the one referenced above, under Display a grid of incidents, and do not automatically open assigned incidents.
Note: If you select Filter from the last, in the field to the right, be sure to type the number of hours for limiting the incident grid.
- Click OK.