Print an account record
- (If one is not open already) Open an existing account record.
-
Near the bottom of the dialog box, click Print.
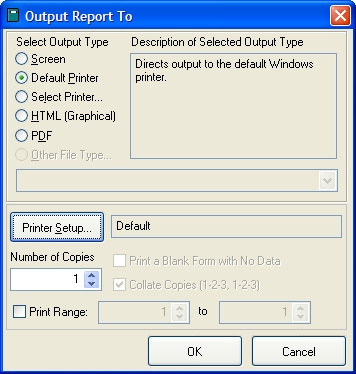
The Output Report To dialog box appears.
- Specify values in the dialog box as appropriate to your needs.
-
Click OK.
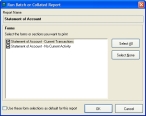
The Run Batch or Collated Report dialog box appears.
-
(Optional) Under Forms, select or clear forms to indicate what information you want to include in the account information you will print.
Tip: Click Select All or Select None to quickly clear or select the entire list of forms.
- (Optional) Select Use these form selections as default for this type of report to set your current from selections as the default for account record printing.
-
Click OK.
The Query Parameters - Account Transactions dialog box appears.
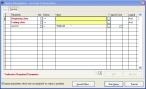
- In the Beginning date row, in the Value column, enter the beginning of the date range you want to include when printing the account report, or click the lookup
 button in the ? column and use the calendar that appears to select the date.
 - In the Ending date row, in the Value column, enter the end of the date range you want to include when printing the account report, or click the lookup button in the ? column and use the calendar that appears to select the date.
-
Click Run Query.
If any invoice or payment activity is found in the date range you specified in the Query Parameters - Account Transactions dialog box, a Statement of Account is created for the account record, and sent to the output type you selected in the Output Report To dialog box. If no invoice or payment activity is found, no Statement of Account is created.