Export data
-
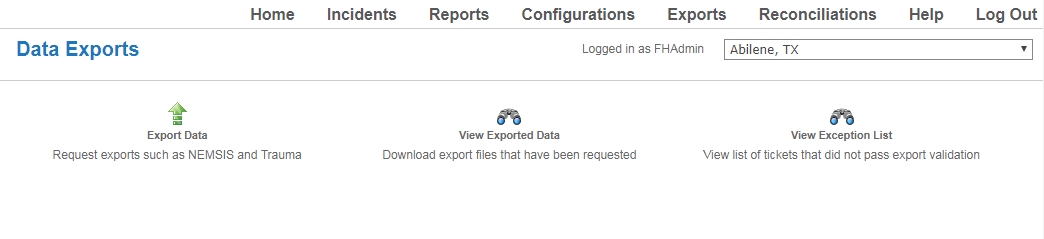
In the row of links that appear across the top of every page, click Exports.

The Data Exports page appears.
-
Click Export Data.
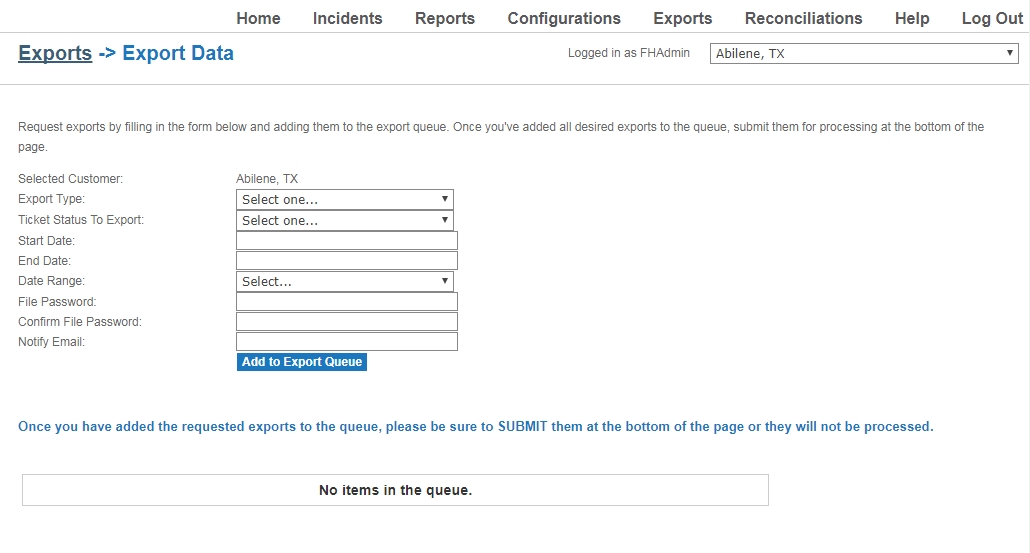
The Exports -> Export Data page appears.
- From Export Type, select the type of data you want to export.
- From Ticket Status To Export, select the status of tickets you want to export.
-
Do one of the following.
 Specify a specific start and end date
- In Start Date and End Date, click in the field, and then use the calendar menu that appears to specify the beginning and ending dates for the data you want to export.
Specify a general date range
-
From Date Range, select the option that describes the general date range you want to export data for.
Example: Today, Yesterday, Last Month, Last 90 days
- In File Password and Confirm File Password, type a password you want a reader to enter before viewing the data.
- In Notify Email, type the email address of the person you want to notify when the export completes.
-
Click Add to Export Queue.
A table appears in the bottom half of the page, listing the information you specified.

-
(If necessary) On the left side of the row, click Delete.
The export disappears from the export queue table.
-
Click Submit Export Requests.
A message appears, stating that the exports in the table have been submitted for processing and should be ready within the next 24 hours.