Activate and configure additional FH installations
Note: When you install FH on additional computers in your network, you do not need to activate the FH installations on these additional computers.
FH stores the activation and configuration information you specified when you set up your first installation of FH, and automatically applies it to the additional installations of FH when you connect the new installation of FH with your FH database.
To connect to the database, you need to change the necessary paths in FH to point to the data and components folders.
-
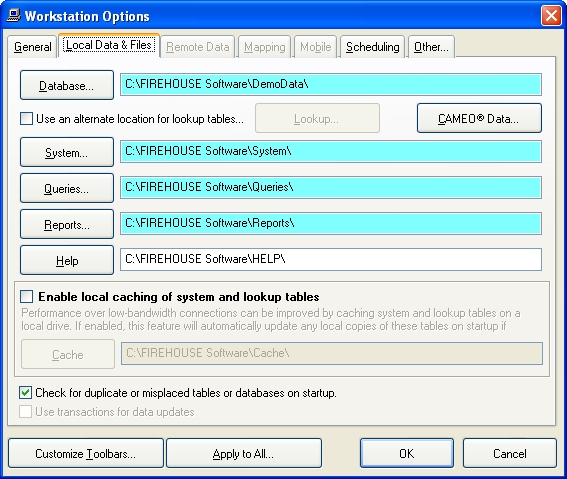
Choose Tools → Workstation Options.
The Workstation Options dialog box appears.
-
Click the Local Data & Files tab.
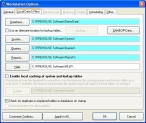
- Click Database and use the file browser that appears to navigate to the
DATAfolder you copied to the network drive, or click in the Database field and type the path. - Repeat the previous step for the
SYSTEM,QUERIES, andREPORTSto change the path from the current folder location to the copy of the folder on the network drive. -
Click OK.
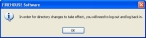
A confirmation message stating that startup database changes have occurred and that you may need to exit and restart FH appears.

-
Click OK.
A second confirmation message, stating that system database changes have occurred and you may need to exit and restart FH appears.
-
Click OK.
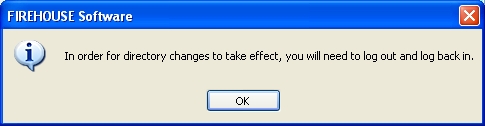
A third confirmation message, stating that directory changes have occurred and you need to exit and restart FH appears.
- Click OK.
- Exit FH.

The next time you start FH and log in, FH activates the new installation of FH and uses the stored configuration information.