Getting started
Once you have a basic understanding of defining areas and drawing lines, you are ready to draw an area and let FH Sketch perform the calculations. There are three basic concepts to drawing areas in FH Sketch: defining the area, establishing the POB (point of beginning), and drawing and closing the area.
-
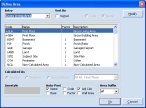
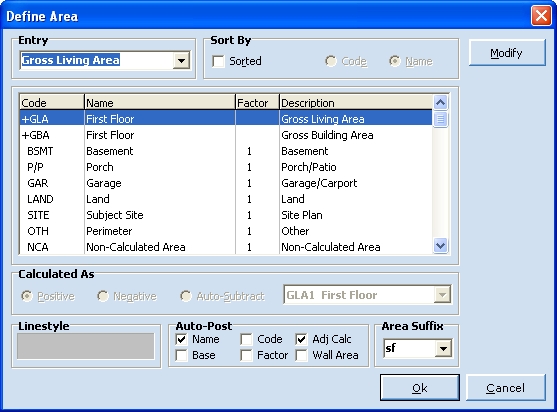
Choose Draw → Define Area.
The Define Area dialog box appears.
-
Select GLA (Gross Living Area) from the list, and then click Ok.
The Define Area (Sub-Categories of GLA) dialog box appears.
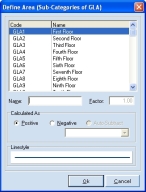
- From Code, select GLA1.
- In Name, type a name for the area you are defining, and then click Ok.
-
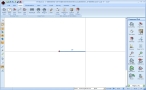
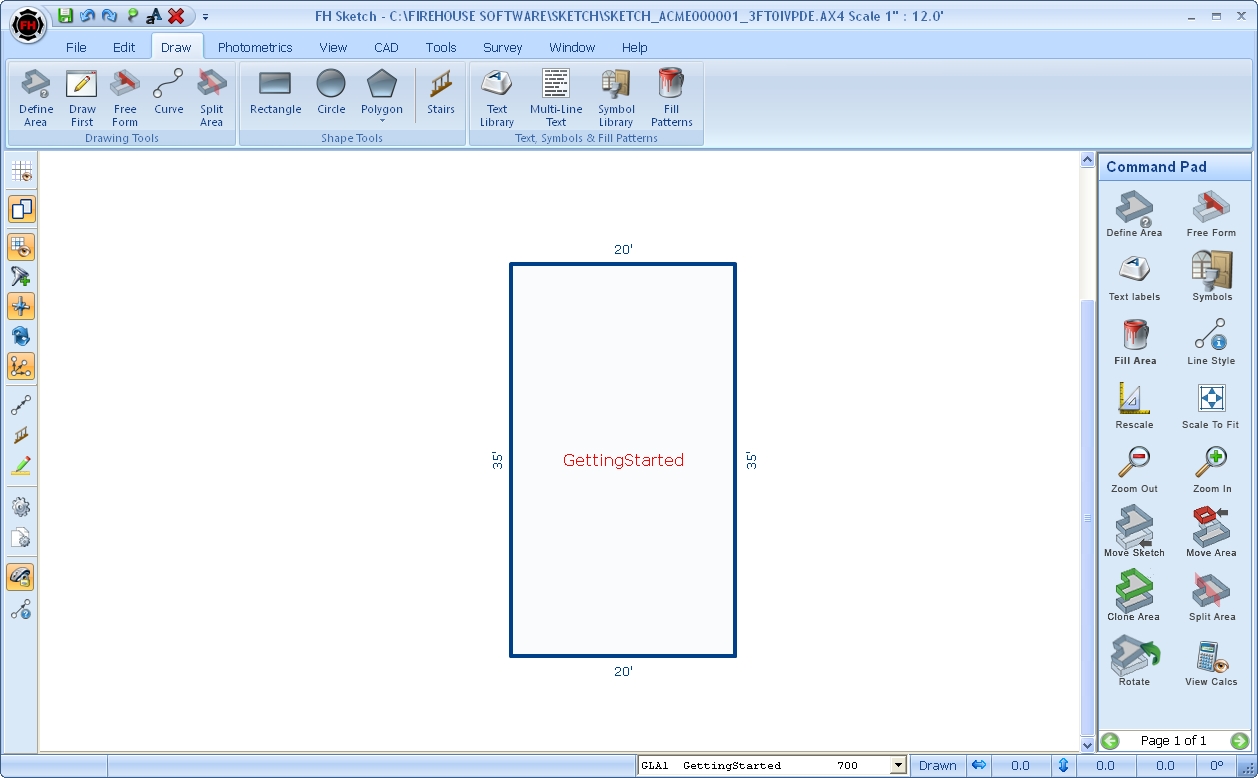
Move the cursor to the approximate center of the drawing port with your mouse or arrow keys.
At this point, the cursor is still an arrow, to indicate the FH Sketch is in pen-up (non-drawing) mode.
-
Press Enter on the keyboard to define the point of beginning (POB) for the line.
The cursor becomes a cross-hair, to indicate that FH Sketch is in pen-down (drawing) mode. You will need to draw back to the POB to close the area, so that it can be calculated.
-
 Draw a line using entry from the keyboard, with the steps below.
-
Type 20 to indicate the length of the line.
Tip: If you make a mistake typing in the distance, press Esc to clear the input, and try again.
- Press the right arrow to indicate the direction of the line.
- Press Enter to anchor the end of the line.
- Press Enter to anchor the dimension.
Note: If you drew the line incorrectly (rubbered or anchored), press Backspace to delete the last line you drew. Continuing to press Backspace incrementally deletes lines in the reverse order they were drawn.
FH Sketch draws a line 20' to the right and then waits for your next entry, to define the next line in the area.
-
-
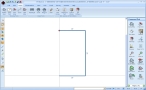
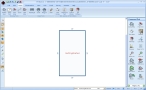
Using the keyboard, draw the next two lines of a simple rectangle.
- Type 25, press the down arrow, press Enter, and then press Enter.
- Type 20, press the left arrow, press Enter, and then press Enter.
FH Sketch draws the second line 25' down, the third line 20' to the left, and then waits for your next entry.
-
Close the area in one of these ways.
- Press the A key to automatically close the area, and then press Enter.
- Type 25, press the up arrow, press Enter, and then press Enter.
FH Sketch draws a line from the last anchored point directly back to the POB and anchors it, and the name you specified earlier for the area appears.
-
Press Enter to anchor the area name.
The calculated square feet of the area appears at the cursor.
-
Press Enter to anchor the calculated square feet.
The EDDTin the center of the bottom of the user interface updates and displays the code, area name, and calculation of the last-drawn area.
-
Press C on the keyboard to center the sketch.
As your drawings become larger and/or more complex, being able to quickly center the sketch in the printable region of the drawing port can be a great time-saver, and keeps your work in front of you at all times.
Tip: In large or complex sketches, pressing C may result in all or a portion of your sketch being out of view. When working with full-page forms, you may want to click the Center in View icon in the toolbar on the left side of the user interface.
-
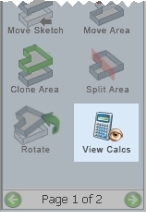
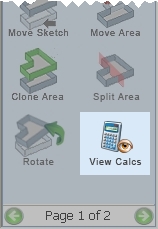
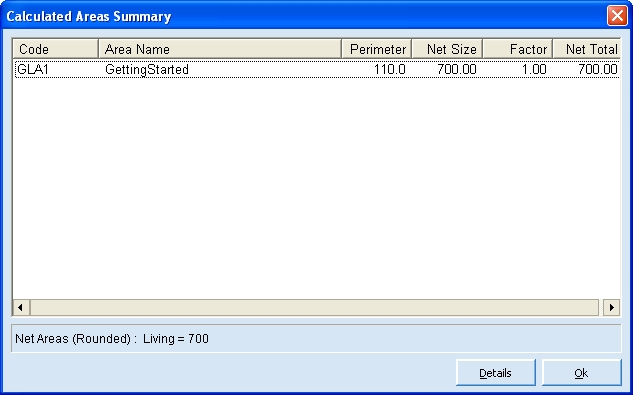
On the right side of the interface, under Command Pad, click View Calcs.
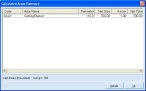
The Calculated Areas Summary dialog box appears.
-
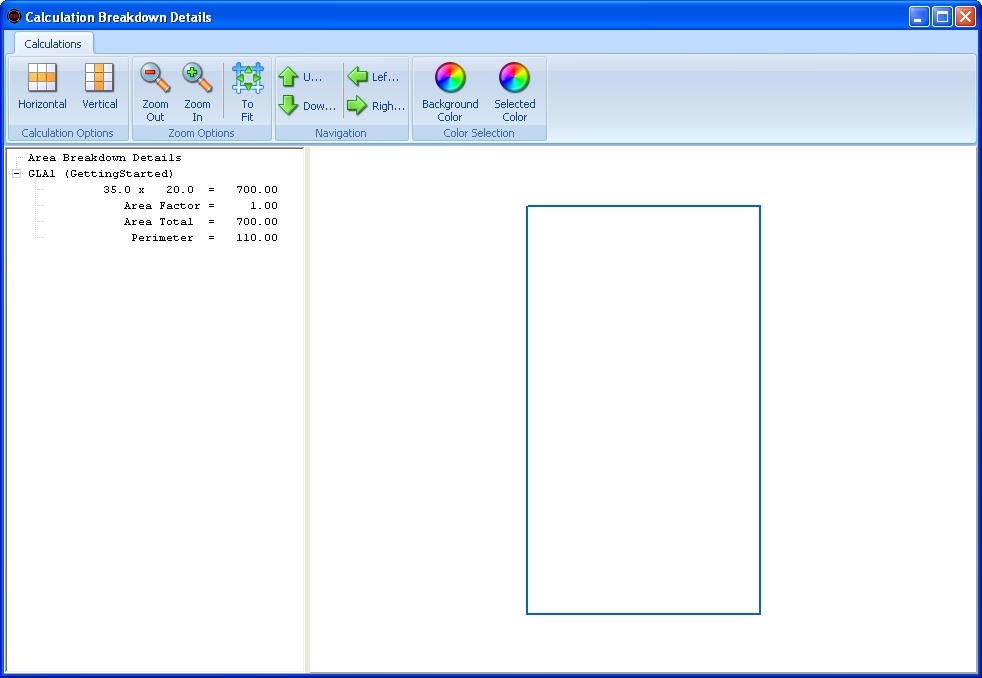
Click Details.
The Calculation Breakdown Details dialog box appears.
- Review the calculation details, and then close the dialog box.
- Choose File → Save to save your sketch.
- Choose File → Exit to return to FH.


Note: Video lessons for using FH Sketch are available at http://www.firehousesoftware.com/ fhsketch/.