Install and configure Box Sync
-
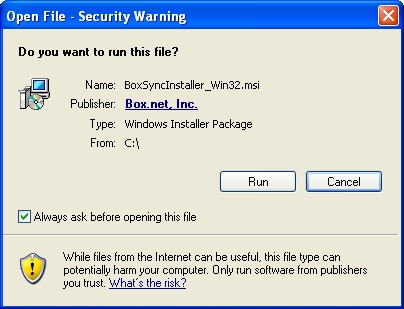
Navigate to the location where you saved the Box installation file, and double-click the
.MSIfile to launch the installation wizard. -
Click Run.
A prompt to run the
BoxSyncInstaller_Winsoftware appears.
-
Click Run.
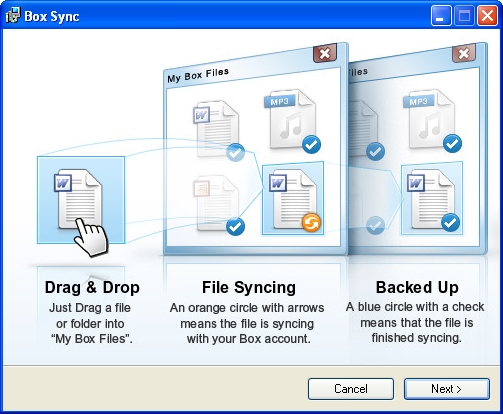
The Box Installer dialog box appears with a progress bar as the installation wizard downloads. When the download completes, the Box Sync installation wizard appears.
-
Click Next >.
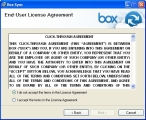
The End-User License Agreement screen of the installation wizard appears.
-
Select I accept the terms in the License Agreement, and then click Next >.
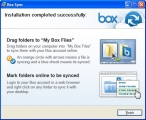
The Installing Box Sync screen of the wizard appears with a progress bar. When the installation finishes, the Installation completed successfully screen of the wizard appears.
-
Click Finish.
The Box Sync dialog box appears.
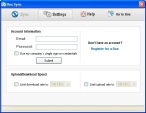
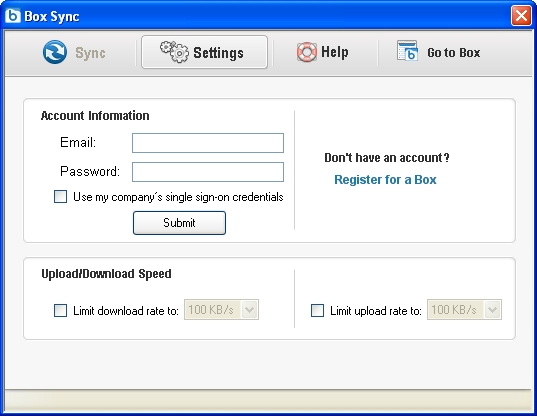
- Under Account Information, in Email and Password, type your email address and password.
-
Click Submit.
You are logged into your Box.com account, the folder on your computer synchronizes with the folder on Box.com, and the Box Sync dialog box refreshes to show synchronization information.
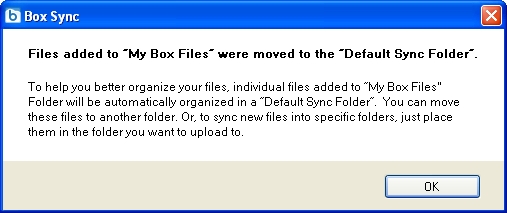
Note: The installation process created a new folder named
My Box Filesin yourMy Documentsfolder.Warning: Do not delete the
My Box Filesfolder, as both Box and FH CMS use it. -
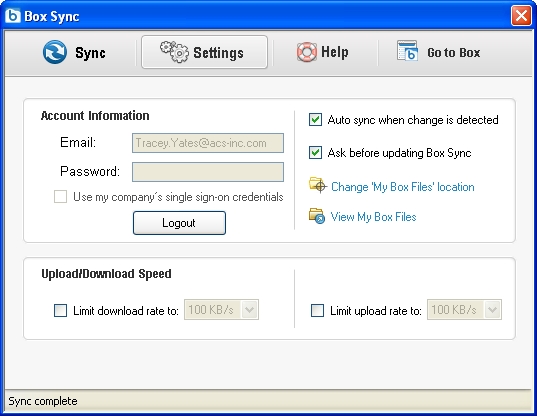
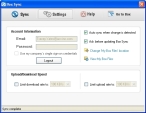
At the top of the dialog box, click Settings.
The Settings screen appears in the dialog box.
-
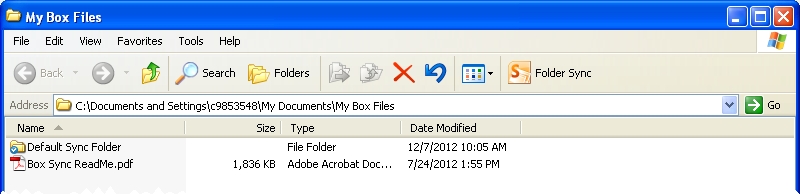
On the right side of the dialog box, click View My Box Files.
A Windows Explorer window opens, and the contents of your
My Documents\My Box Filesfolder should be theDefault Sync Folder, and theBox Sync ReadMe.pdffile.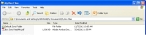
-
 (If the
 Default Sync Folderdoes not appear in yourMy Documents\My Box Filesfolder) Do the following.- From anywhere on your hard drive, copy any file and paste it into your
My Documents\My Box Filesfolder. -
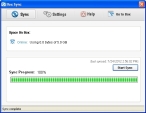
In the Box Sync dialog box,in the upper left corner of the dialog box, click Sync.
A confirmation dialog box appears.
-
Click OK.
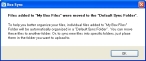
The file you added to the folder uploads to your department's account folder on the FH Cloud, and a confirmation message appears across the bottom of the dialog box.
-
Click Settings.
The Settings screen reappears in the dialog box.
-
Click View My Box Files again.
The Windows Explorer window containing your
My Documents\My Box Filesfolder reappears, and theDefault Sync Folderis now in it.
- From anywhere on your hard drive, copy any file and paste it into your
-
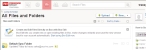
In the upper right corner of the dialog box, click Go to Box.
A new browser window appears, containing the All Files and Folders page.
-
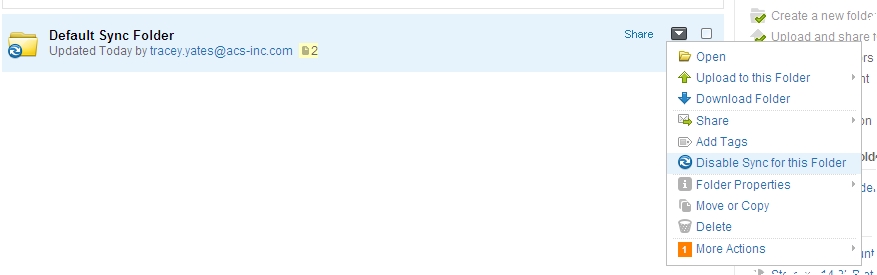
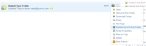
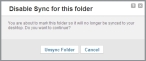
For the Default Sync Folder, choose Share → Disable Sync for this Folder.
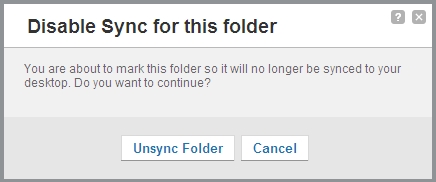
The Disable Sync for this Folder dialog box appears.
-
Click Unsync Folder.
The message
Sync was successfully disabled for "Default Sync Folder."appears at the top of the page. -
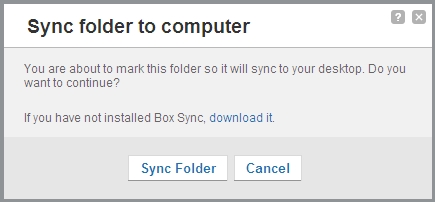
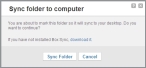
For the Default Sync Folder, choose Share → Sync Folder to Computer.
The Sync folder to computer dialog box appears.
-
Click Sync Folder.
The message
Sync was successfully enabled for "Default Sync Folder."appears at the top of the page. - Close the Box Sync dialog box.
- Continue with Install the FireRescue1 Academy import utility in FH.