Display, filter, and export personnel lists
When you first access the PM module, it opens to the Personnel screen, with the All Personnel filter selected. Depending on the size of your department, this list can be extensive. Fortunately, you can quickly reduce this list to only the personnel records you want to work with.
You can display this list of personnel as including everyone, only new personnel added in the recent past, those personnel who can log in to the ESO Suite, those who have current certifications or who are missing certifications, those who have expiring certification, credential, immunizations, and more.
-
 (If you have not done so already) Access the PM or PM Basic module in the ESO Suite.
Which version of the module opens depends on whether your agency or department has purchased the PM Basic or full version of the PM module.
-
Do one of the following.
-
(If you are already working in the ESO Suite) Click the Home icon in the upper left corner of the screen.
-
(If you have not yet logged in) Log in to the ESO Suite.
-
In a web browser, go to https://www.esosuite.net/EsoSuite.
The ESO Suite login screen appears.
-
Enter your user name, password, and agency name, then click Let's Go.
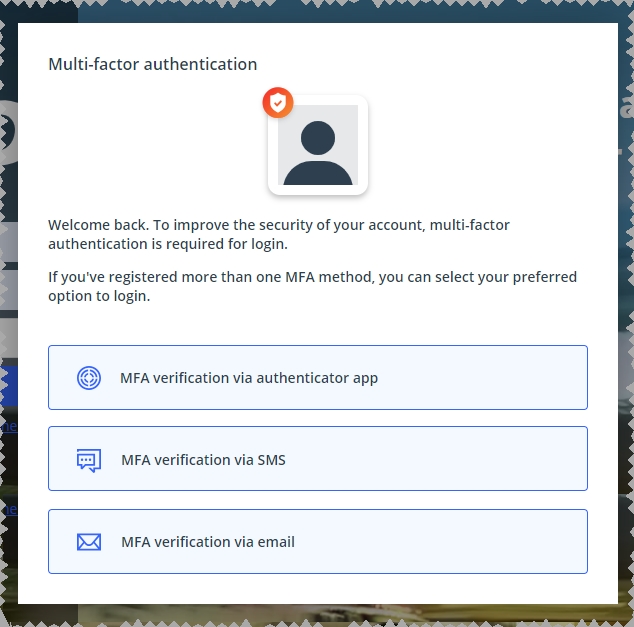
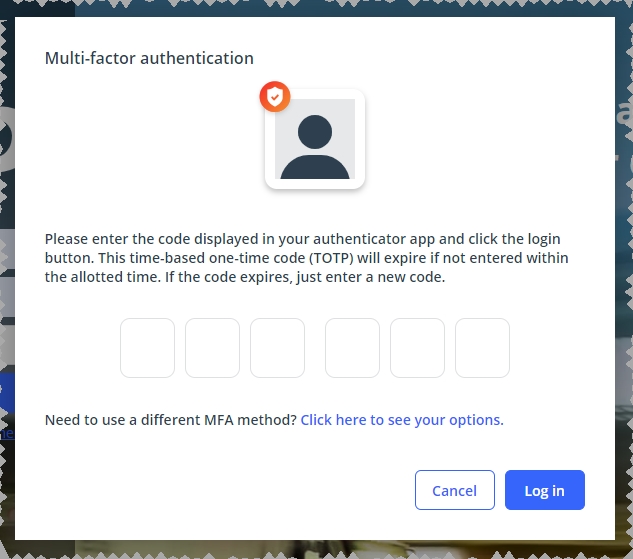
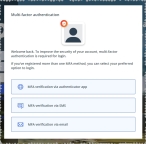
If MFA is enabled, the Multi-factor authentication dialog box appears, displaying one or more methods you can use to verify your login credentials. The number of methods that appear in the dialog box depends on what MFA methods your ESO Suite administrators enabled in the Admin module.
Click graphics
to open them.Information on enabling MFA and specific MFA methods is available in the Admin module online help, in Configure multiple-factor authentication.
Note: If your ESO Suite administrators have disabled MFA ("opted-out"), this dialog does not appear.
-
(If the Multi-factor authentication dialog box appears) Depending on which buttons appear in the dialog box, verify your login in one of the following ways.
With an authenticator application.
-
Click MFA verification via authenticator app.
The dialog box updates with boxes for entering the numbers of the authentication code, and the ESO Suite sends an authentication code to the authenticator application installed on your device.

-
Open your authenticator application and note the authentication code currently displayed.
-
Enter the authentication code displayed in the authenticator application.
-
Click Log In.
With a text message (SMS).
-
Click MFA verification via SMS.
The dialog box updates with boxes for entering the numbers of the authentication code, and the ESO Suite sends an authentication code to the phone number recorded in your PM records and identified with MFA codes.

-
Enter the authentication code sent to your MFA-registered phone number.
-
Click Log In.
With an email message.
-
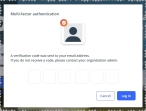
Click MFA verification via email.
The dialog box updates with boxes for entering the numbers of the authentication code, and the ESO Suite sends an authentication code to your agency or department email address, recorded in your PM records.
-
Enter the authentication code sent to your agency or department email address.
-
Click Log In.
-
-
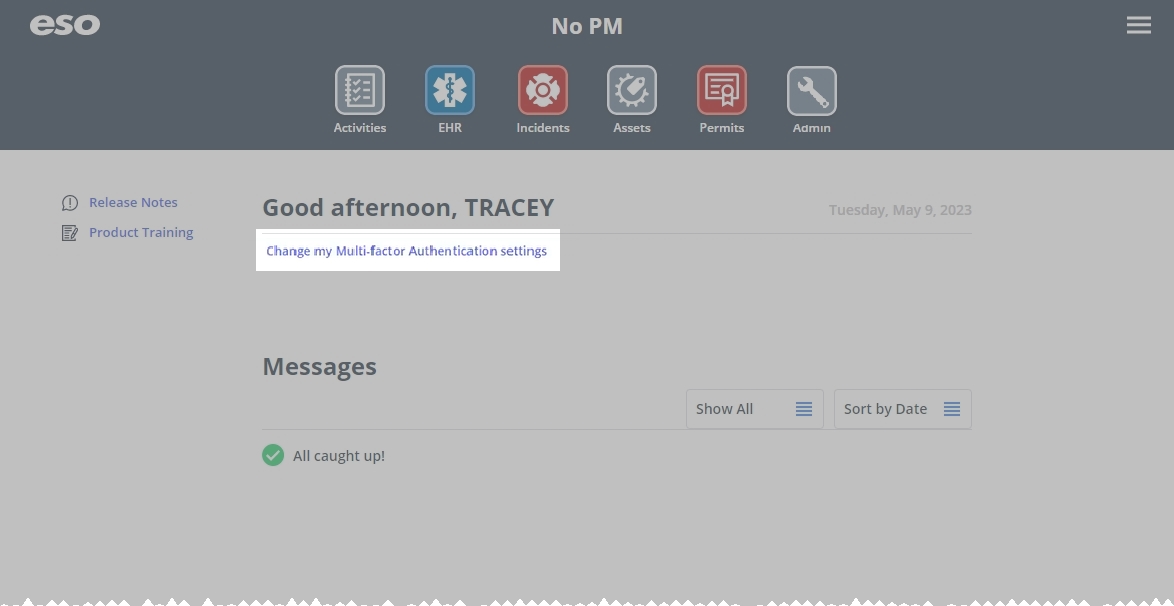
The ESO Suite landing screen appears.
Click graphics
to open them.Note: If MFA is enabled, you can access and manage your MFA options through the PM module, on the Settings > Account page, as described in Manage a user account. If your agency or department has enabled MFA but has not purchased the full-featured version of the PM module, you can access your own MFA settings by clicking Change my Multi-Factor Authentication settings on the landing screen, then using the Settings > Account page that appears. If your agency has not enabled MFA, the Change my Multi-Factor Authentication settings link does not appear on the landing screen.
-
-
On the top side of the home screen, click PM.
Tip: If your screen or browser window is too narrow to display all your agency's ESO Suite module icons, an options icon appears on the right side of the icon bar. If you click the options icon, a menu appears containing additional module icons.
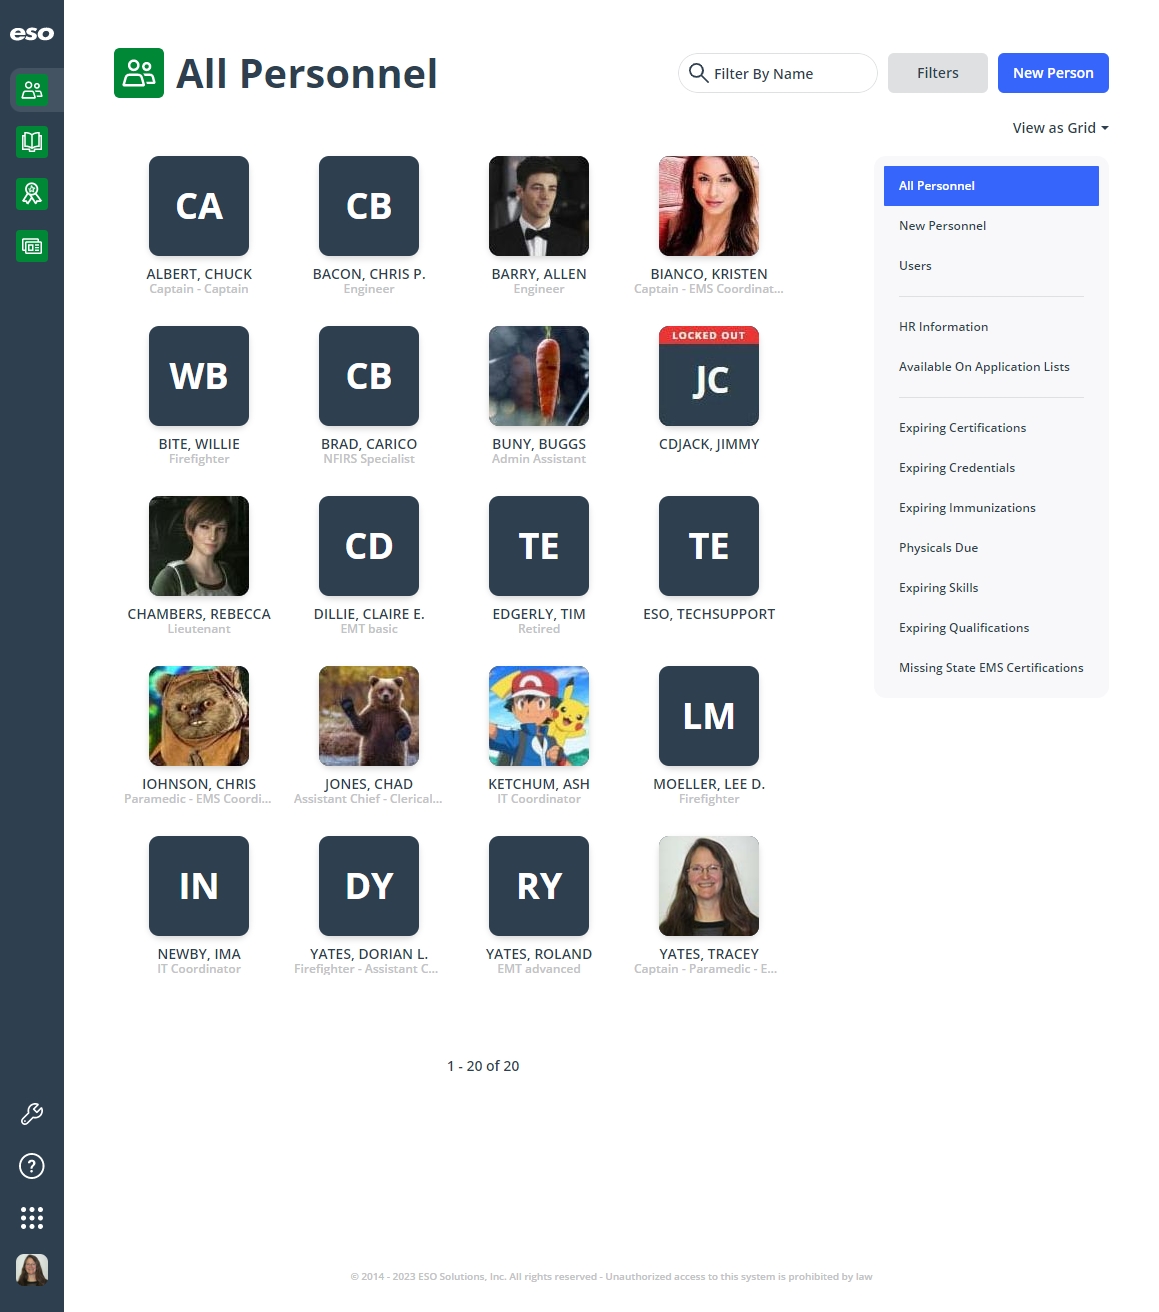
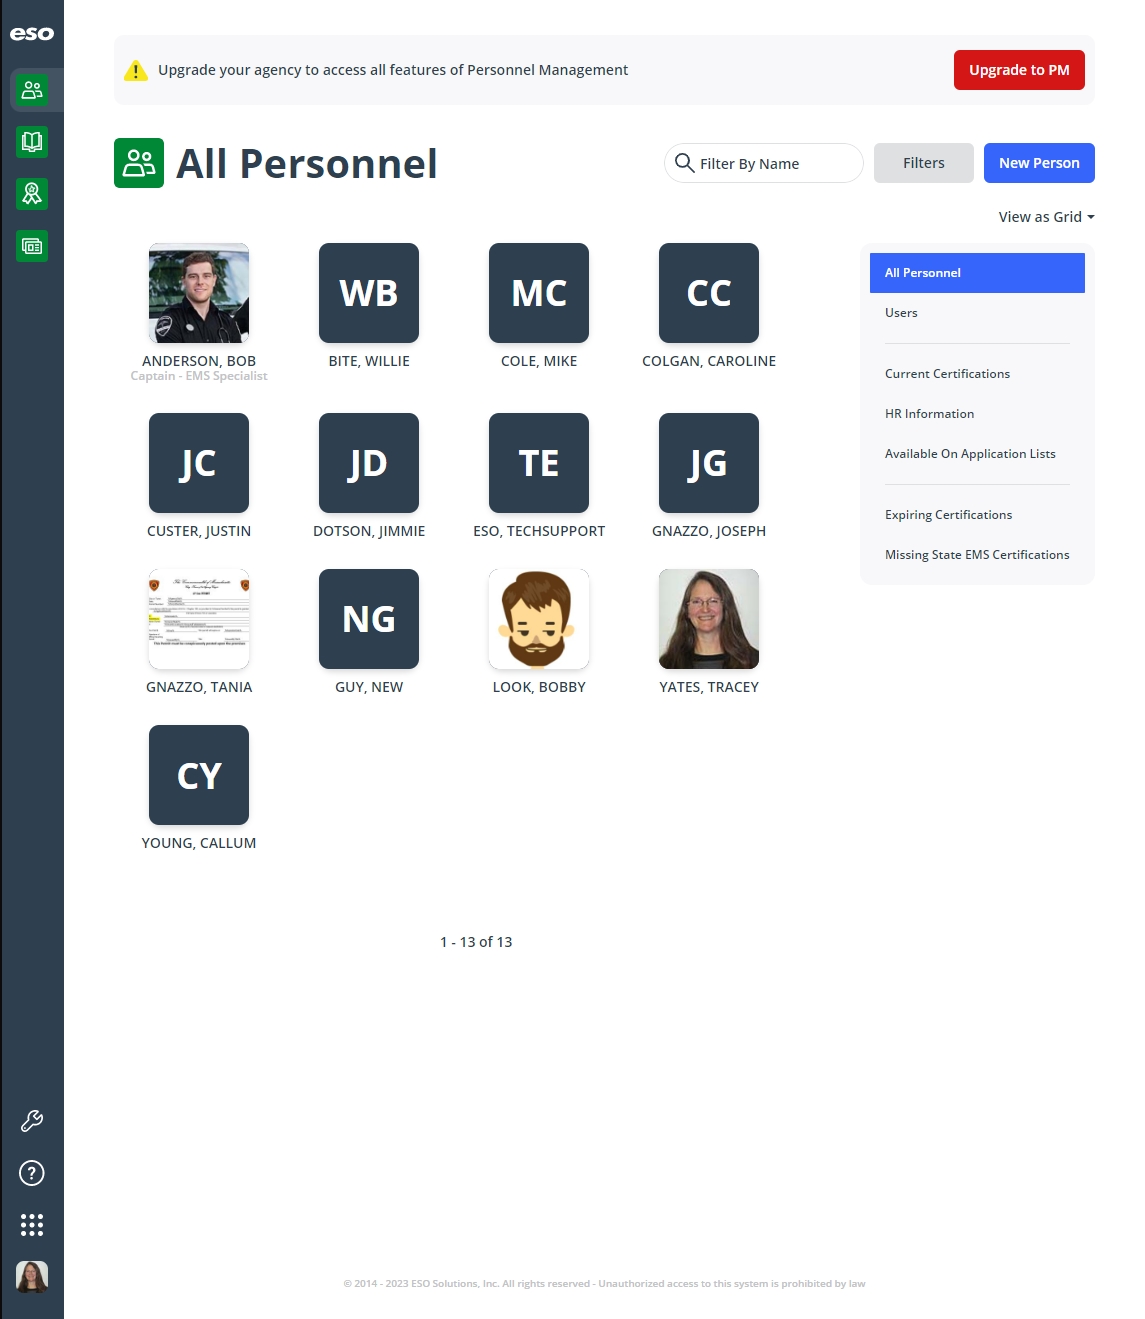
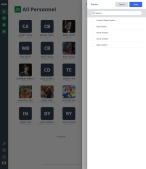
A list of all the personnel in the PM module appears, displayed in a grid format.
PM (full version) PM Basic 
Note: If you can access the full-featured PM module, you can view all your own information in it. The amount of information you can edit in the PM module depends on what roles and permissions your ESO Suite administrator assigned to your user account.
Information on user accounts, roles, and permissions is available in Manage a user account.
-
-
Display the personnel list in any of these ways.
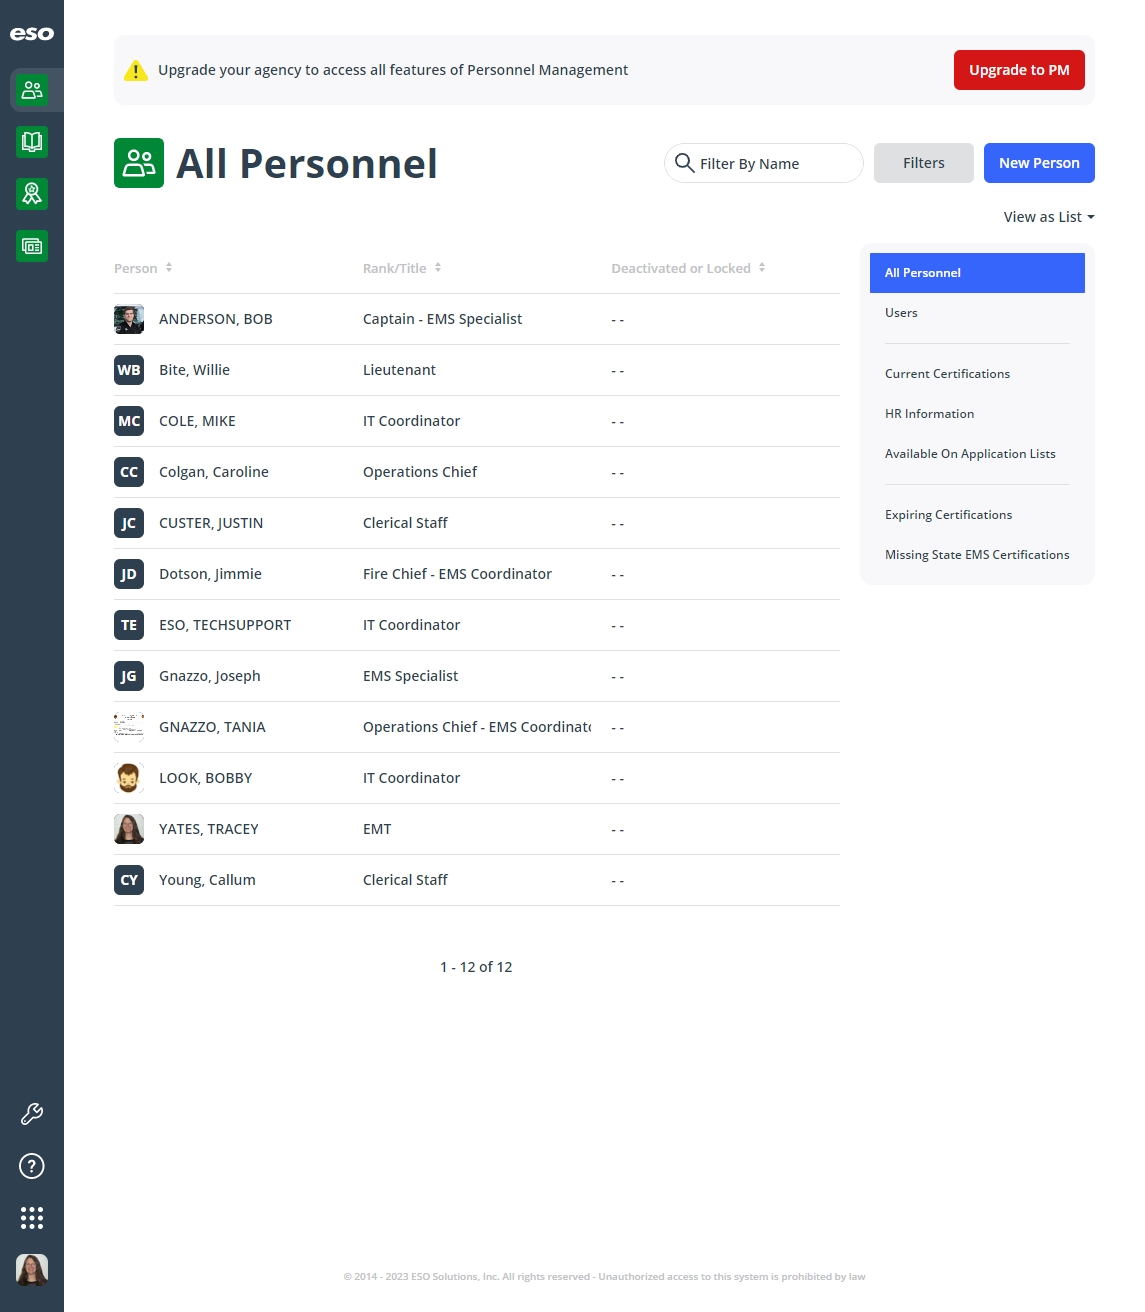
All personnel in the agency or department.
-
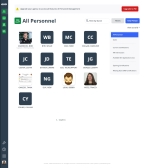
On the right side of the page, click All Personnel.
A list of all the personnel in the PM module appears, displayed in a grid format.
PM (full version) PM Basic
-
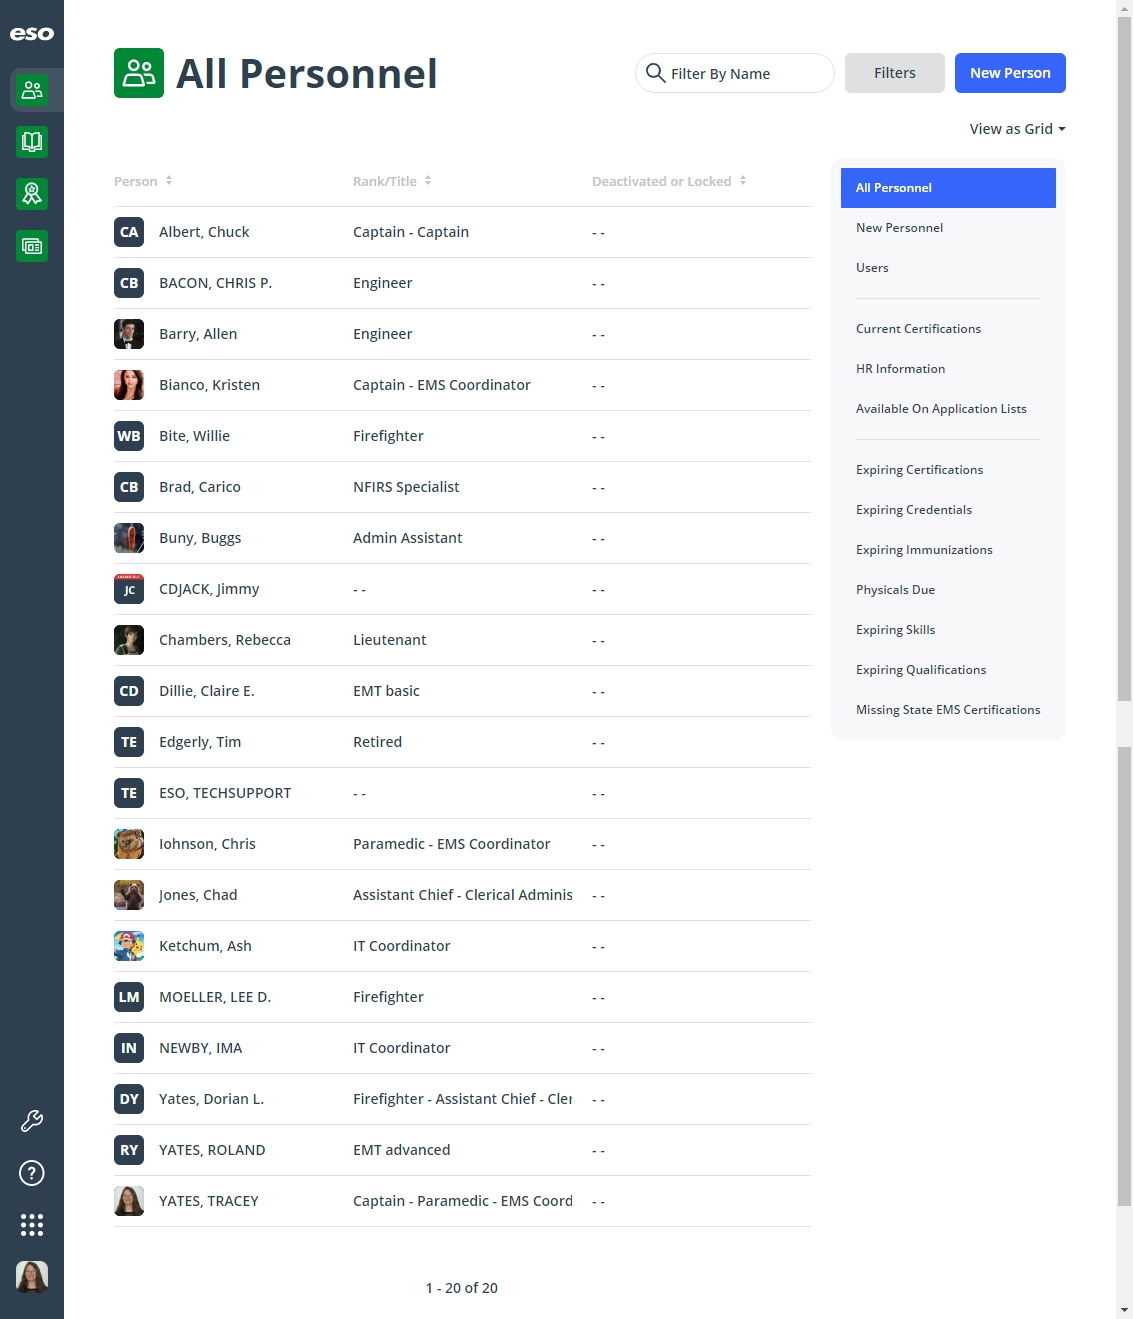
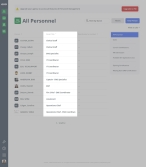
(Optional) On the right side of the page, click View as List or View as Grid to change the list of personnel between display modes.
PM (full version) PM Basic 

Note: If you choose the View as List mode, you can sort the personnel list by last name, rank, or the status (deactivated or locked).
(Optional) Sort the list by ascending or descending values in columns.
-
At the top of all the columns, click the column sort (
 ) icon.
The ascending values (
 ) icon appears, and the column sorts from A–Z, or from 1 to the highest numerical value.
 PM (full version) PM Basic 
-
Click the ascending values icon to sort the list into descending order.
The descending values (
 ) icon appears, and the column sorts from Z–A, or from the highest numerical value to 1.
 PM (full version) PM Basic 

-
Agency personnel with a login to the ESO Suite.
Not every individual in your agency or department's personnel list in the PM module has an ESO Suite user account and login credentials.
-
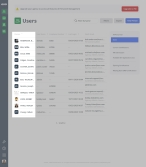
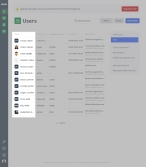
On the right side of the page, click Users.
The Users page appears, listing only the personnel in your department or agency that have an an ESO Suite user account and login credentials.
PM (full version) PM Basic 

Tip:
-
Any personnel with an entry in the User Name column has an ESO Suite user account and login credentials.
-
In the Work Email column, the list of security roles assigned to each column appears. If the role list is wider than can be displayed in the column, and ellipses (...) appears at the right edge of the column. If you hover your mouse pointer over the ellipses, the full information appears in a pop-up.

-
Only personnel with certifications.
-
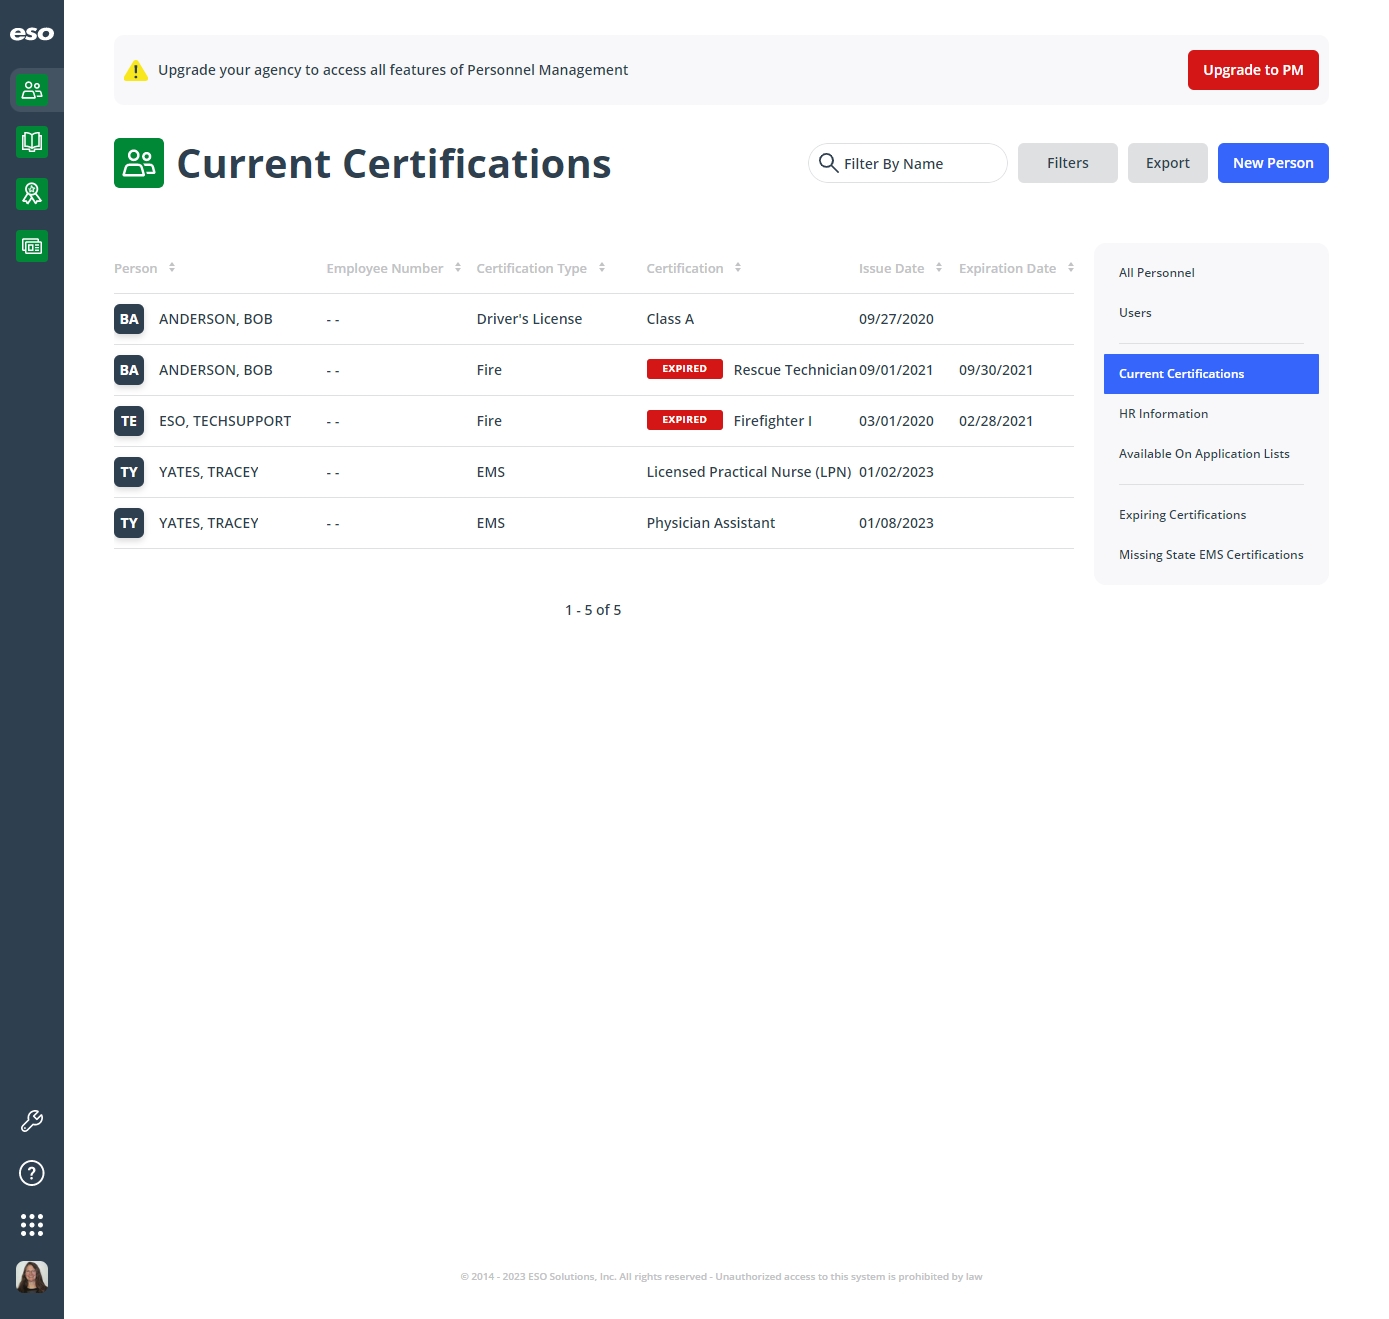
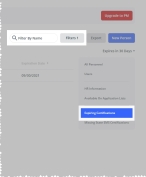
On the right side of the page, click Current Certifications.
The Current Certifications page appears, listing the most current certifications for each person, based on effective date. Active and expired certifications appear in the list, and inactivated certifications do not.
PM (full version) PM Basic 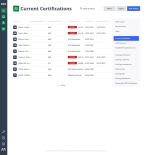

Only personnel who have expiring certifications.
-
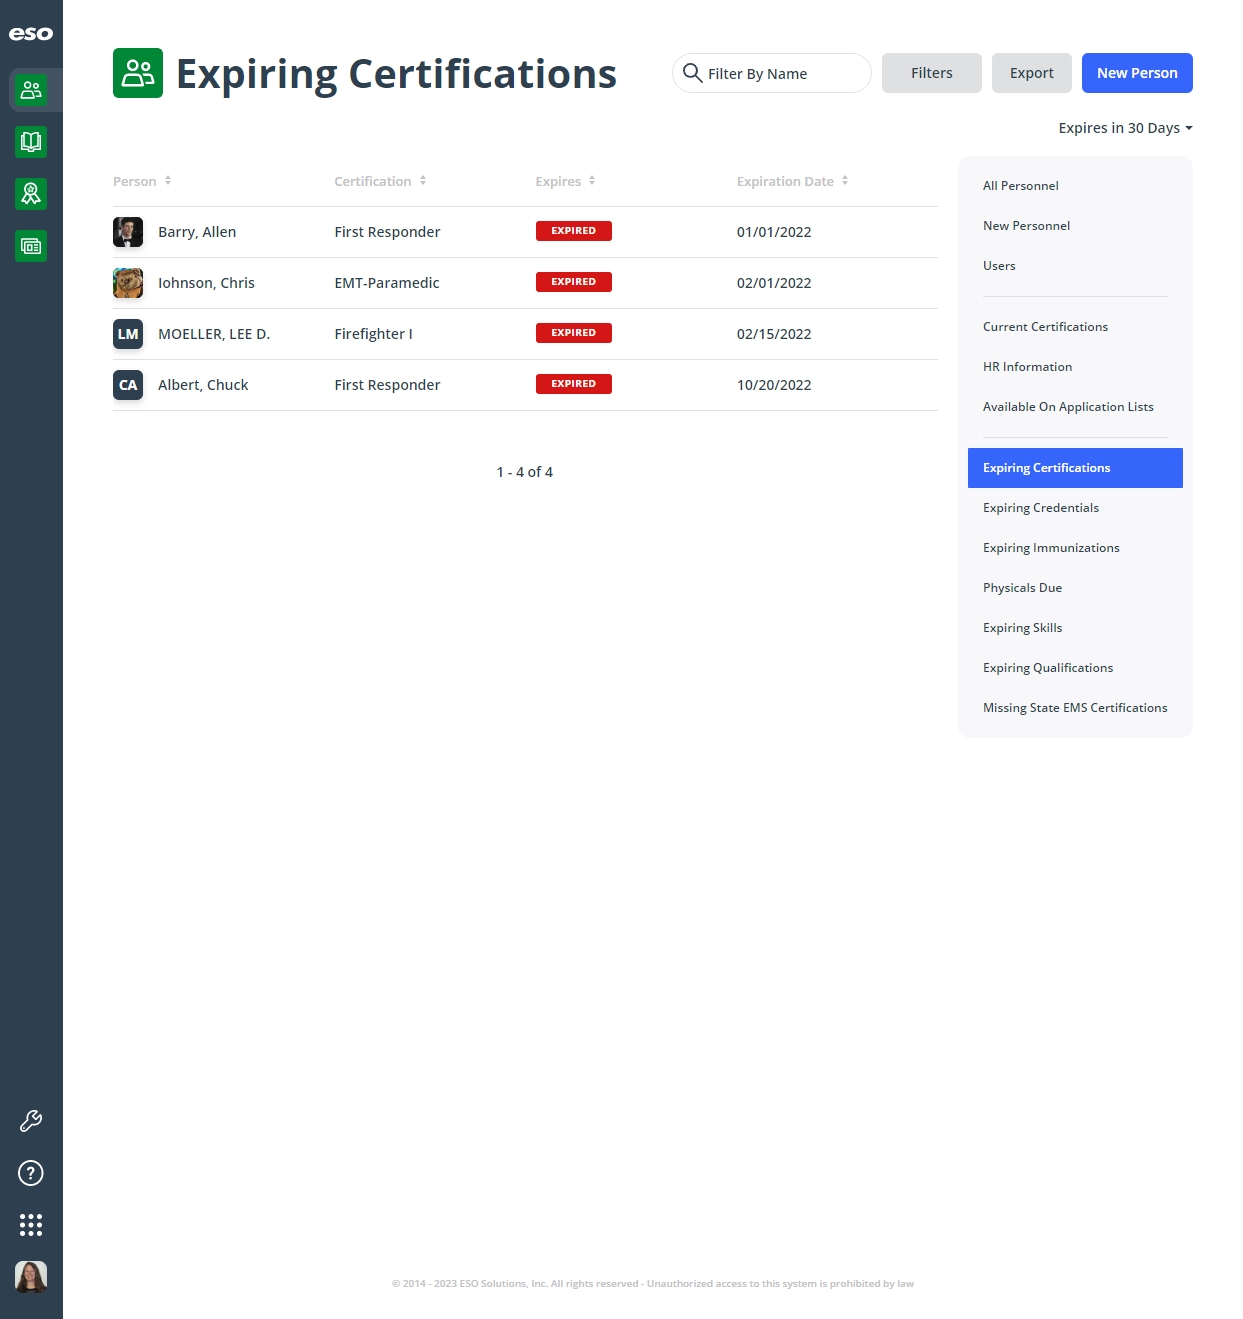
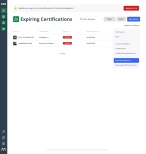
On the right side of the page, click Expiring Certifications.
The Expiring Certifications page appears, listing only the personnel in your department or agency that have expired or nearing-expiration certifications.
PM (full version) PM Basic 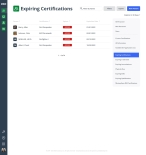
Only personnel who are missing one or more state EMS certifications.
-
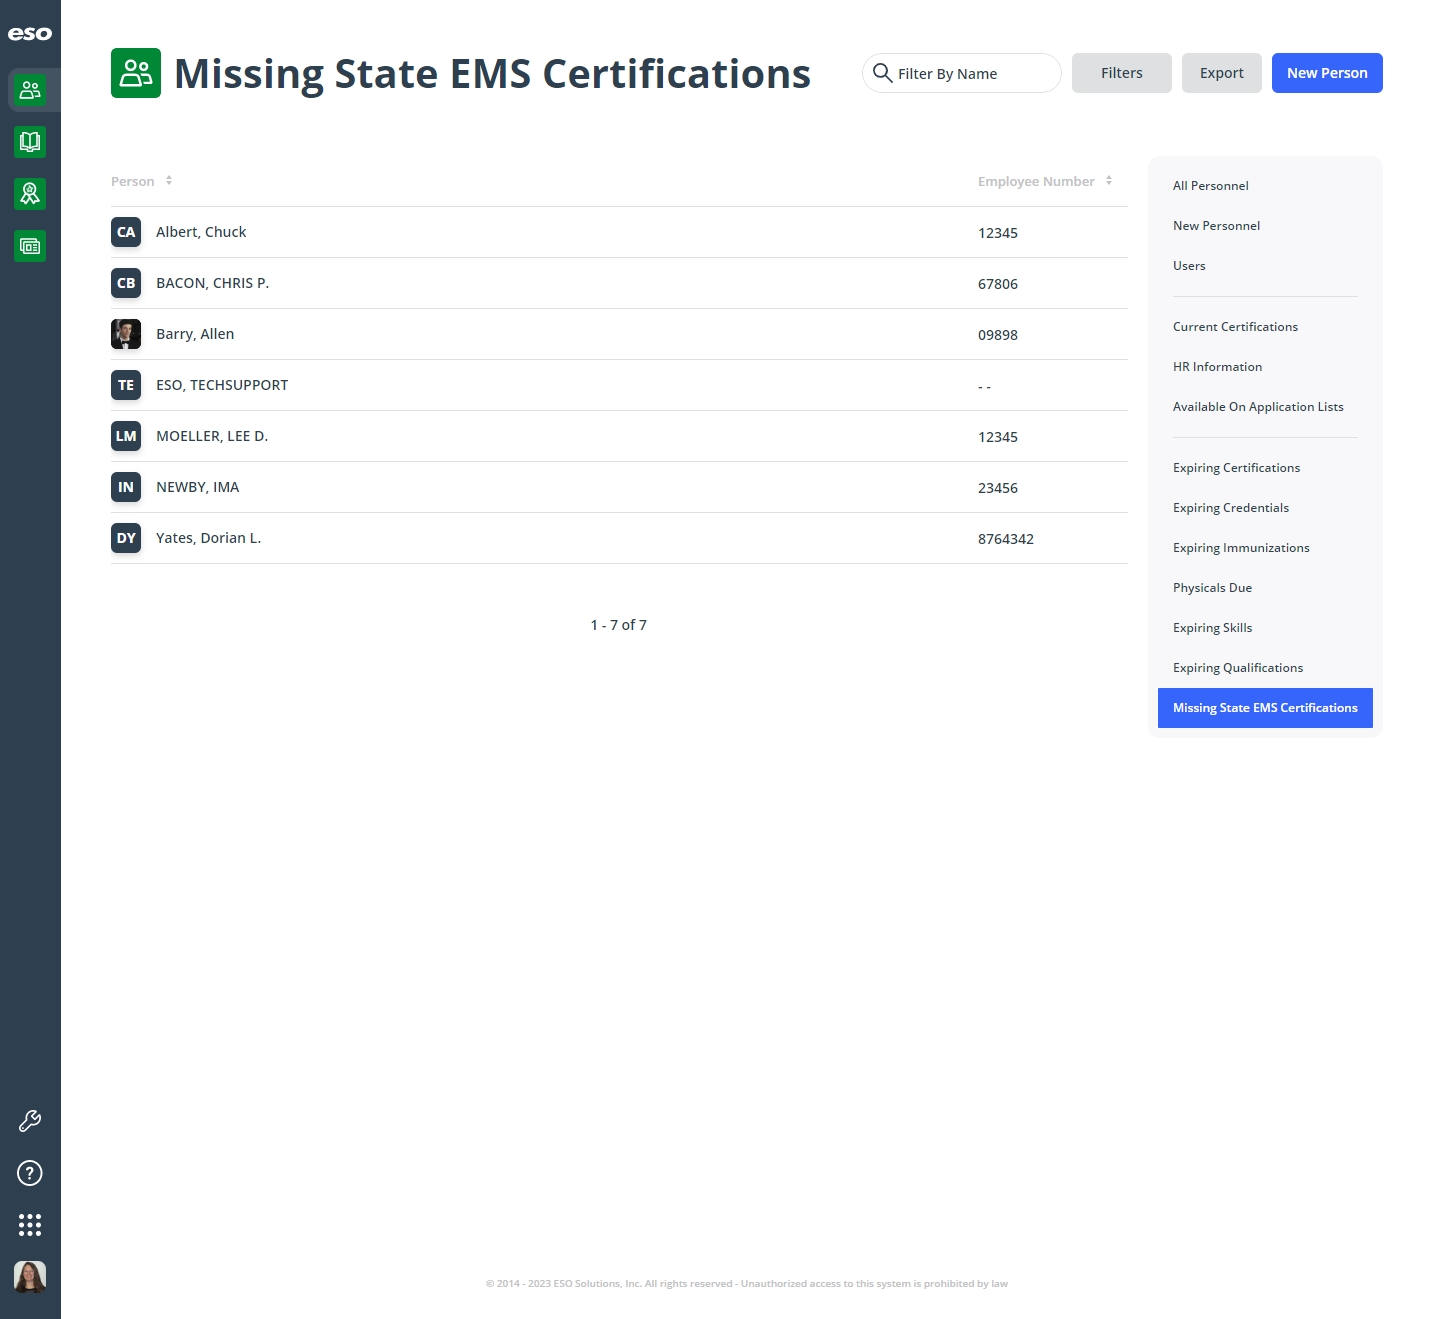
On the right side of the page, click Missing State EMS Certifications.
The Missing State EMS Certifications page appears, listing only the personnel in your department or agency that meet both of the following two conditions.
-
On the Applications Lists page, for Available in EHR, the person has a setting of Yes.
Information on setting the person's availability for lists in the EHR module is available in Set application list visibility in other ESO Suite modules.
-
The person either does not have any EMS certification with a state jurisdiction, or has only expired ones.
Note: A valid EMS certification with a state jurisdiction is required for state reporting of EMS data in the EHR module.
PM (full version) PM Basic 

-
All personnel and a summary of their HR information.
Note: In the full version of PM, you must have the
View HR InfoorEdit HR Infopermissions to access this HR summary list.For information on upgrading to the full version of PM, go to https://www.eso.com/pm-demo/ and fill out the fields to request a demonstration and speak with a sales representative.
-
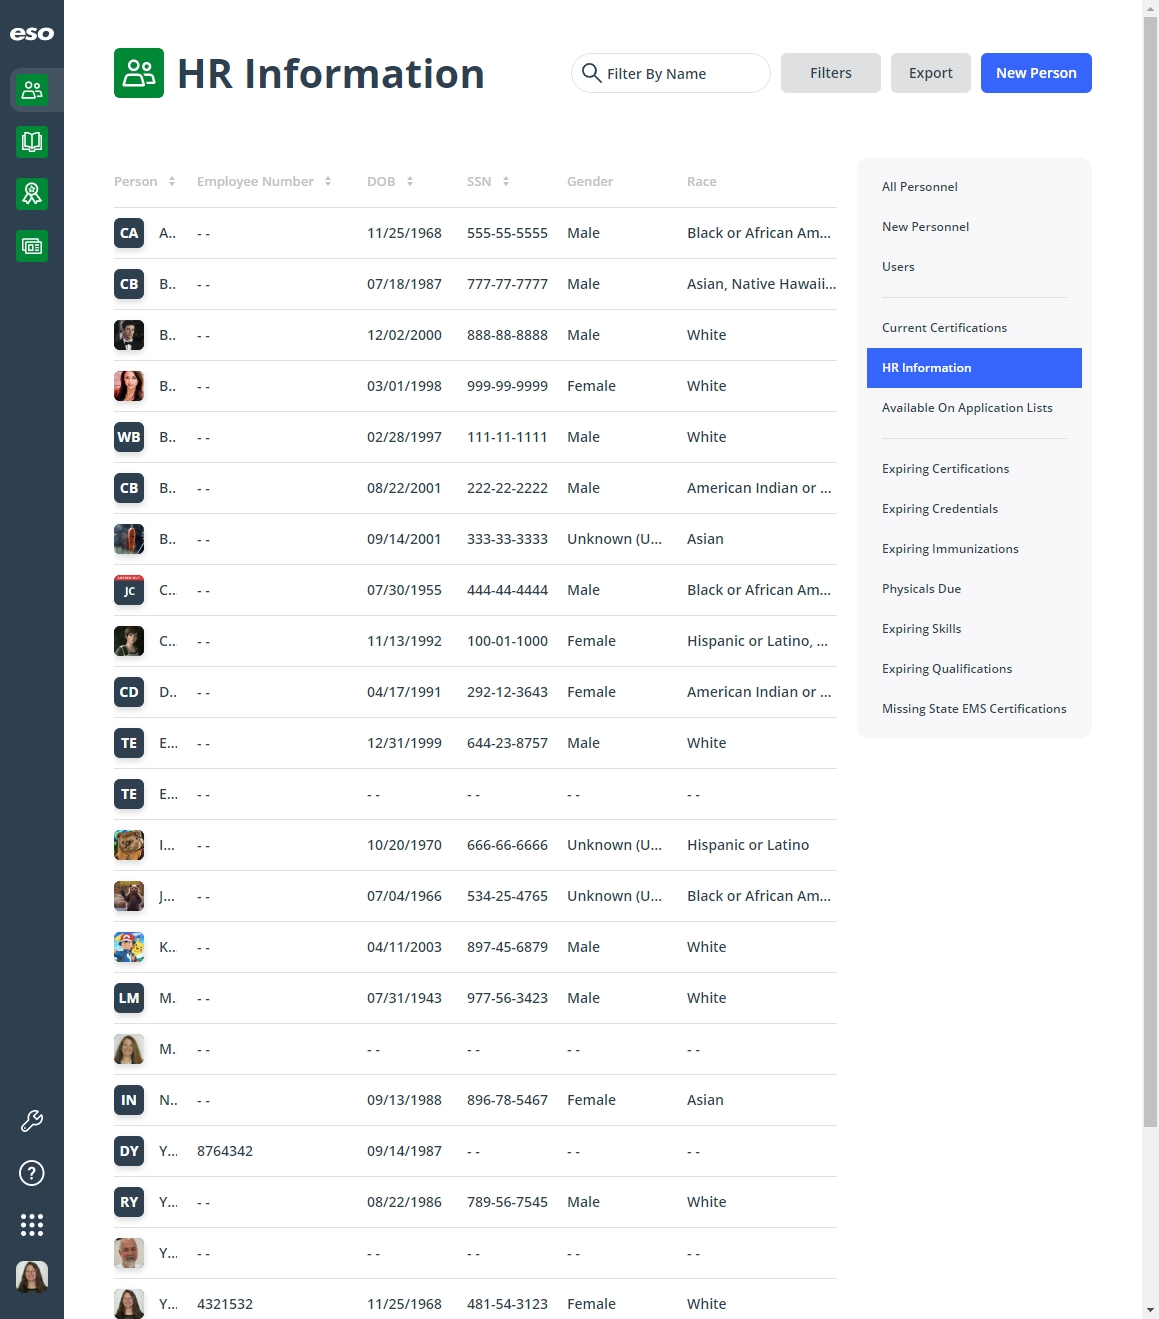
On the right side of the page, click HR Information.
The HR Information page appears, listing all the personnel in your department or agency, and a summary of their key demographic information.
PM (full version) PM Basic 

All personnel and whether they appear in lists in the EHR, Fire Incidents, or Learning Academy modules.
Note:
-
Only personnel who, on their personal record's Settings > Application Lists page, have Available in EHR set to Yes can potentially appear in the Missing State EMS Certifications list.
-
This list includes personnel who either do not have a state EMS certification, or who whose state EMS certification has expired.
-
The Learning Academy option appears only if your agency has purchased the FireRescue1 Academy or EMS1 Academy/Lexipol integration.
Information on managing a person's visibility menus or lists is available in Set application list visibility in other ESO Suite modules.
-
On the right side of the page, click Available on Application Lists.
The Available on Application Lists page appears, listing all the personnel in your department or agency, with an indication of whether each a person's name would appear in menus or lists in other modules in the ESO Suite.
PM (full version) PM Basic 

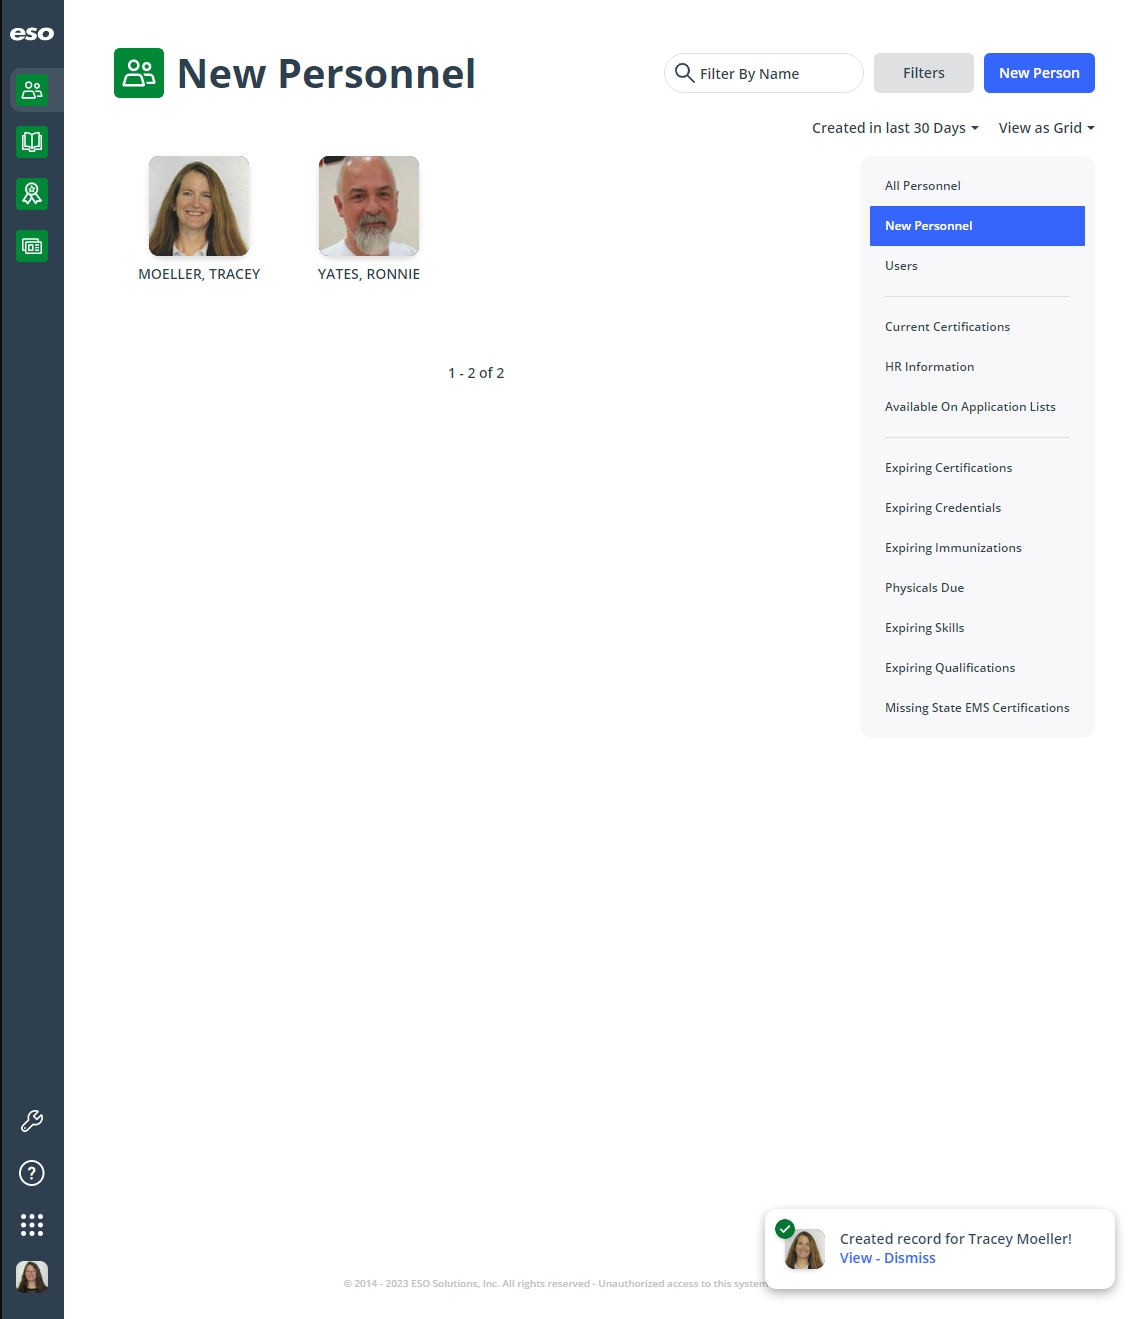
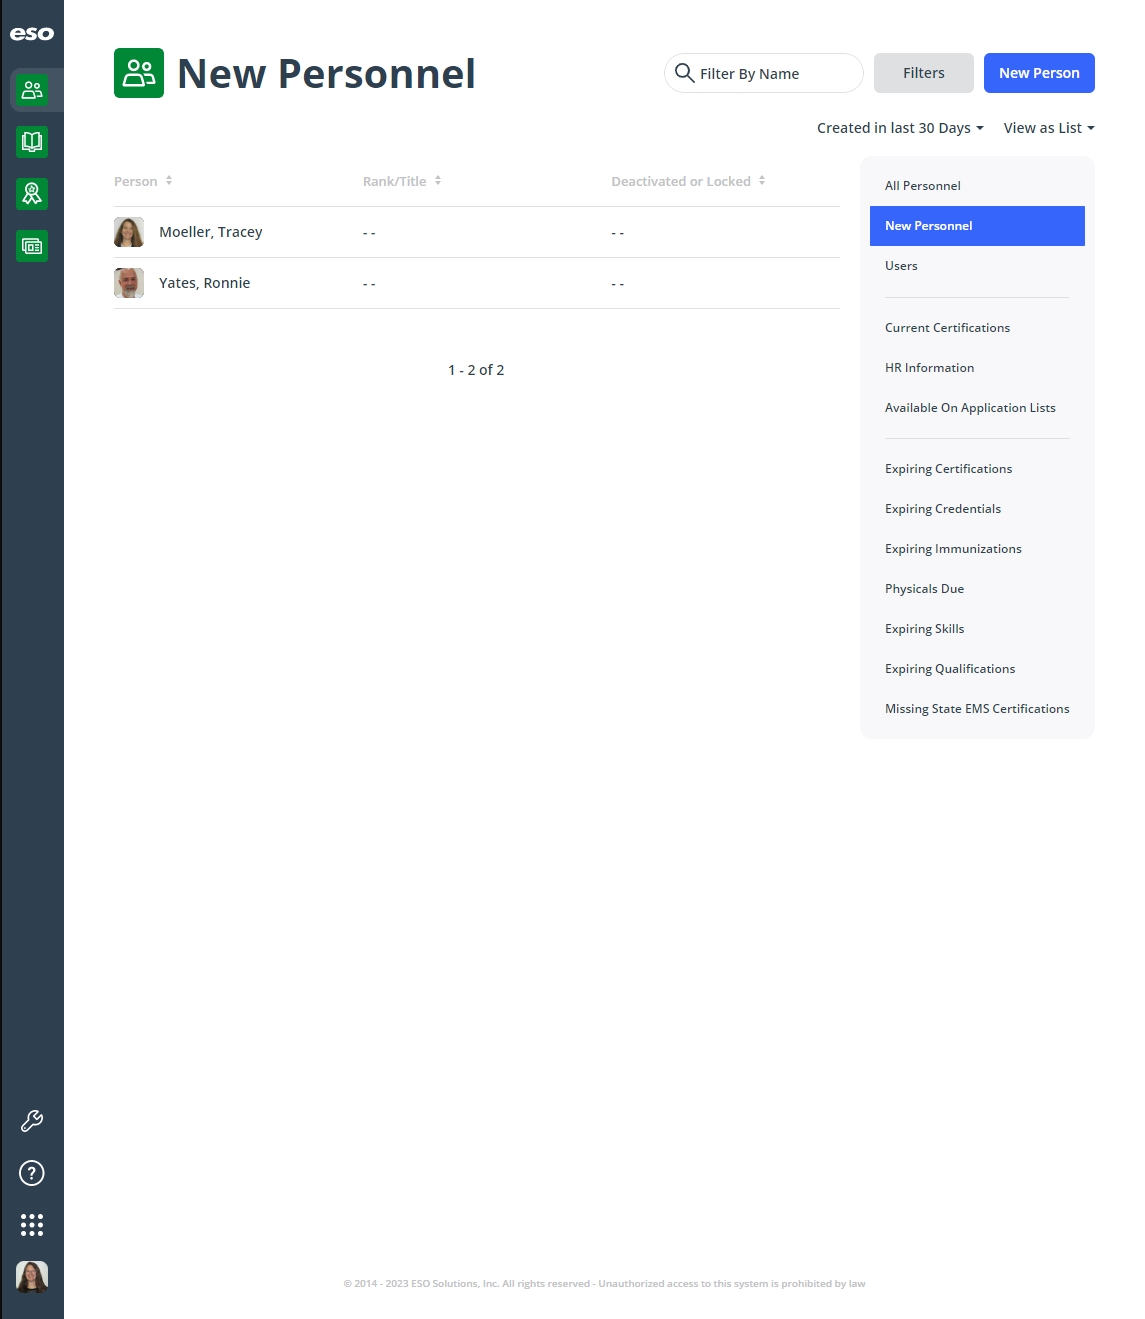
(PM full version) Only personnel recently added to the agency or department.
-
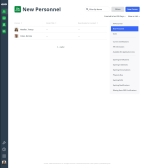
On the right side of the page, click New Personnel.
A list of any personnel added recently to the PM module appears, displayed in a grid format.

-
On the right side of the page, from Created in last, click the field or the list icon to the right of the field, then select the appropriate single option from the menu that appears.

The personnel list updates to include personnel records that fall in the range of days you selected.
-
(Optional) On the right side of the page, click View as List or View as Grid to change the list of personnel between display modes.

Note: If you choose the View as List mode, you can sort the personnel list by last name, rank, or the status (deactivated or locked).
(Optional) Sort the list by ascending or descending values in columns.
-
At the top of all the columns, click the column sort (
) icon.The ascending values (
) icon appears, and the column sorts from A–Z, or from 1 to the highest numerical value. 
-
Click the ascending values icon to sort the list into descending order.
The descending values (
) icon appears, and the column sorts from Z–A, or from the highest numerical value to 1. 
-
(PM full version) Only personnel who have expiring immunizations.
-
On the right side of the page, click Expiring Immunizations.
The Expiring Immunizations page appears, listing only the personnel in your department or agency that have expired or nearing-expiration immunizations.
PM (full version) PM Basic 
-
On the right side of the page, from Expires In, click the field or the list icon to the right of the field, then select the appropriate single option from the menu that appears.
The personnel list updates to include personnel records that fall in the range of days you selected.
Note: The results includes any records that have already expired, plus the records that will expire in the time frame you selected.
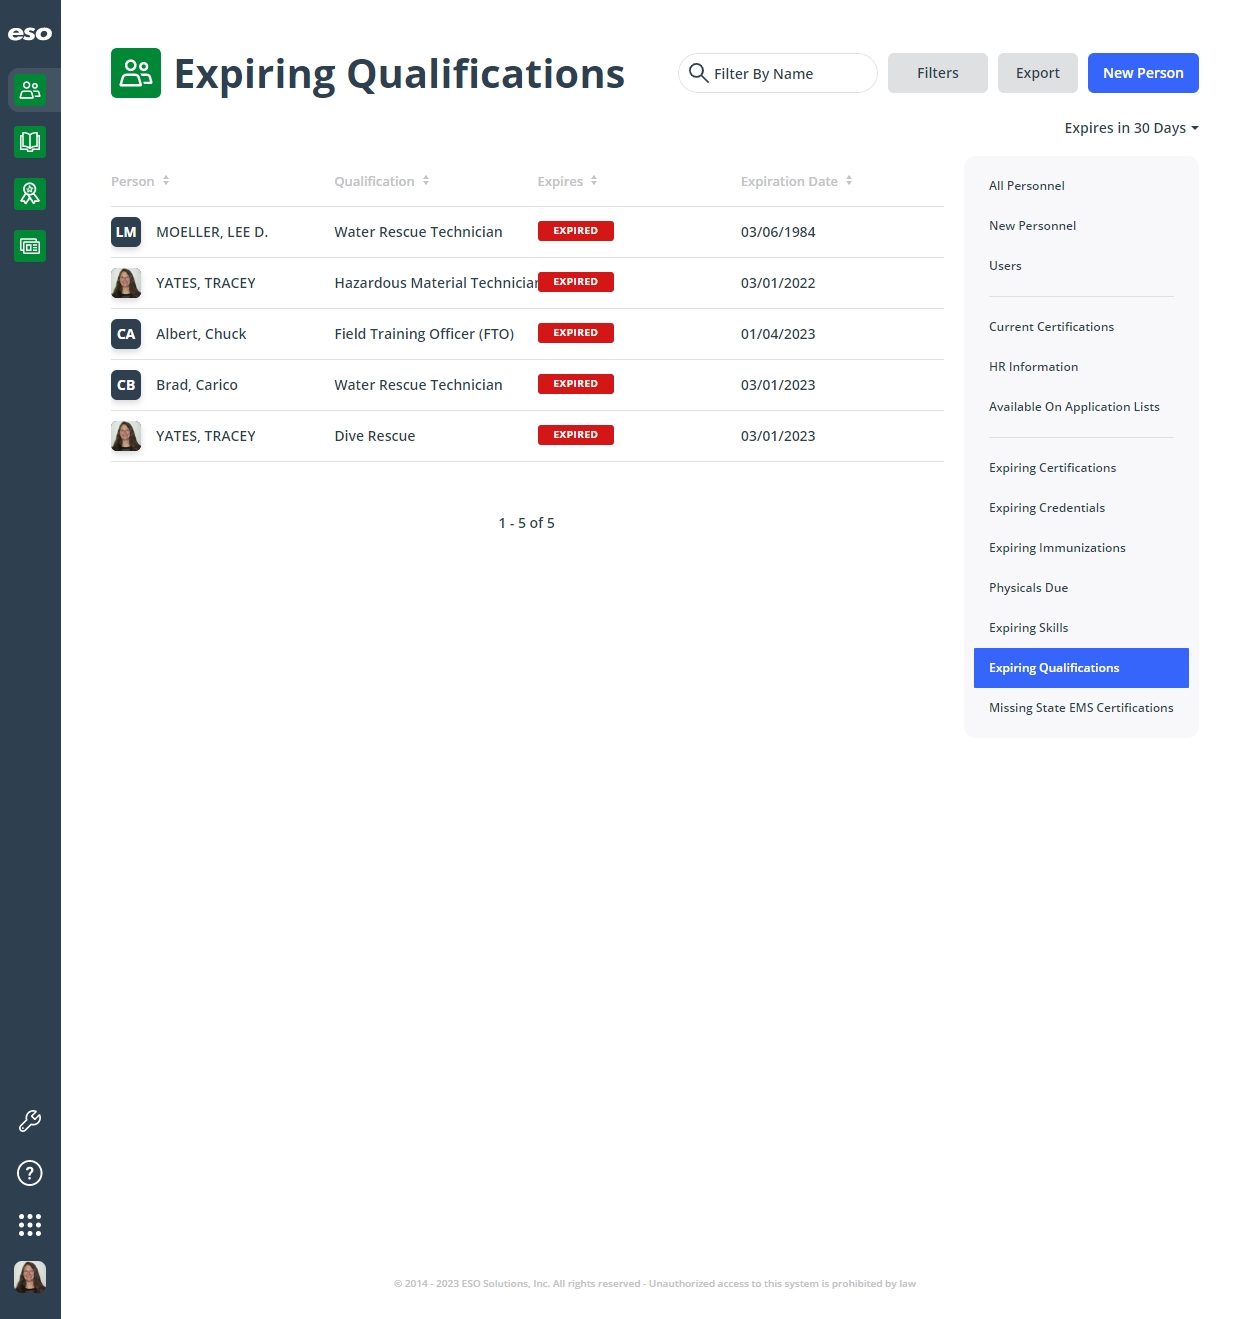
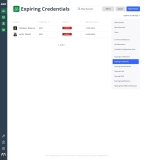
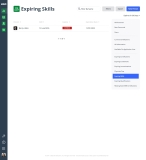
(PM full version) Only personnel who have expiring credentials, skills, and qualifications.
-
On the right side of the page, click Expiring Credentials, Expiring Skills, or Expiring Qualifications.
The Expiring Credentials, Expiring Skills, or Expiring Qualifications page appears, listing only the personnel in your department or agency that have expired or nearing-expiration credentials, skills, or qualifications.

-
On the right side of the page, from Expires In, click the field or the list icon to the right of the field, then select the appropriate single option from the menu that appears.

The personnel list updates to include personnel records that fall in the range of days you selected.
Note: The results includes any records that have already expired, plus the records that will expire in the time frame you selected.
(PM full version) Only personnel who have physicals due soon.
-
On the right side of the page, click Physicals Due.
The Physicals Due page appears, listing only the personnel in your department or agency that have overdue or upcoming physicals.

-
On the right side of the page, , from Due in click the field or the list icon to the right of the field, then select the appropriate single option from the menu that appears.
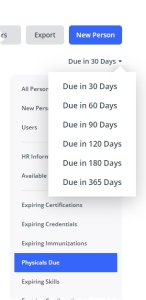
The personnel list updates to include personnel records that fall in the range of days you selected.
Note: The results includes any physicals that are already overdue, plus the physicals that will expire in the time frame you selected.
-
-
(Optional) Sort the list by ascending or descending values in columns.
On most of the personnel lists, you can sort the contents of the list into ascending or descending order, based on the values in a of the columns. You can sort any column that has a set up and down arrows to the right of the column name.
-
At the top of all the columns, click the column sort (
) icon.The ascending values (
) icon appears, and the column sorts from A–Z, or from 1 to the highest numerical value. PM (full version) PM Basic 
-
Click the ascending values icon to sort the list into descending order.
The descending values (
) icon appears, and the column sorts from Z–A, or from the highest numerical value to 1. PM (full version) PM Basic 
-
-
(Optional) Filter the personnel list further.
Note: The filtering methods all work in conjunction, letting you build a logical expression.
Example: You can initially filter the list using a report on expiring certifications, reduce the results further by filtering by rank, then search those results by name.
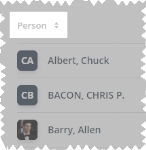
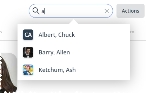
Search for a person by name.
You can search for a person by name in any of the personnel pages that list multiple individuals, or from an individual's personnel record page.
Search for a person in any of the personnel pages that list multiple individuals.
-
In the upper right corner of the page, in Filter By Name, begin typing characters in the name of the person you want to find.

As you type, the list of personnel records reduces to only those people whose names still match the characters you are entering.
Search for a person from an individual's personnel record page.
-
In the upper right corner of the page, in Search Personnel, begin typing characters in the name of the person you want to find.

As you type, a menu appears of all personnel whose names still match the characters you are entering.
Note: By default, all lists are filtered to active personnel. You need to change the list filters to include deactivated personnel.
Use filters to reduce the list.
The PMmodule applies the filters you select in the steps below in a logical AND construction, to reduce the matches with each additional criteria you use.
Understand the link between the PM and Admin modules, when filtering personnel records.
The menu options that appear for fields referenced in the steps below are defined in the Admin module, under the following.
-
General >
- Battalions
- Divisions
- Shifts
- Stations
- Units and Apparatus
-
PM > Work Lists >
- Qualifications
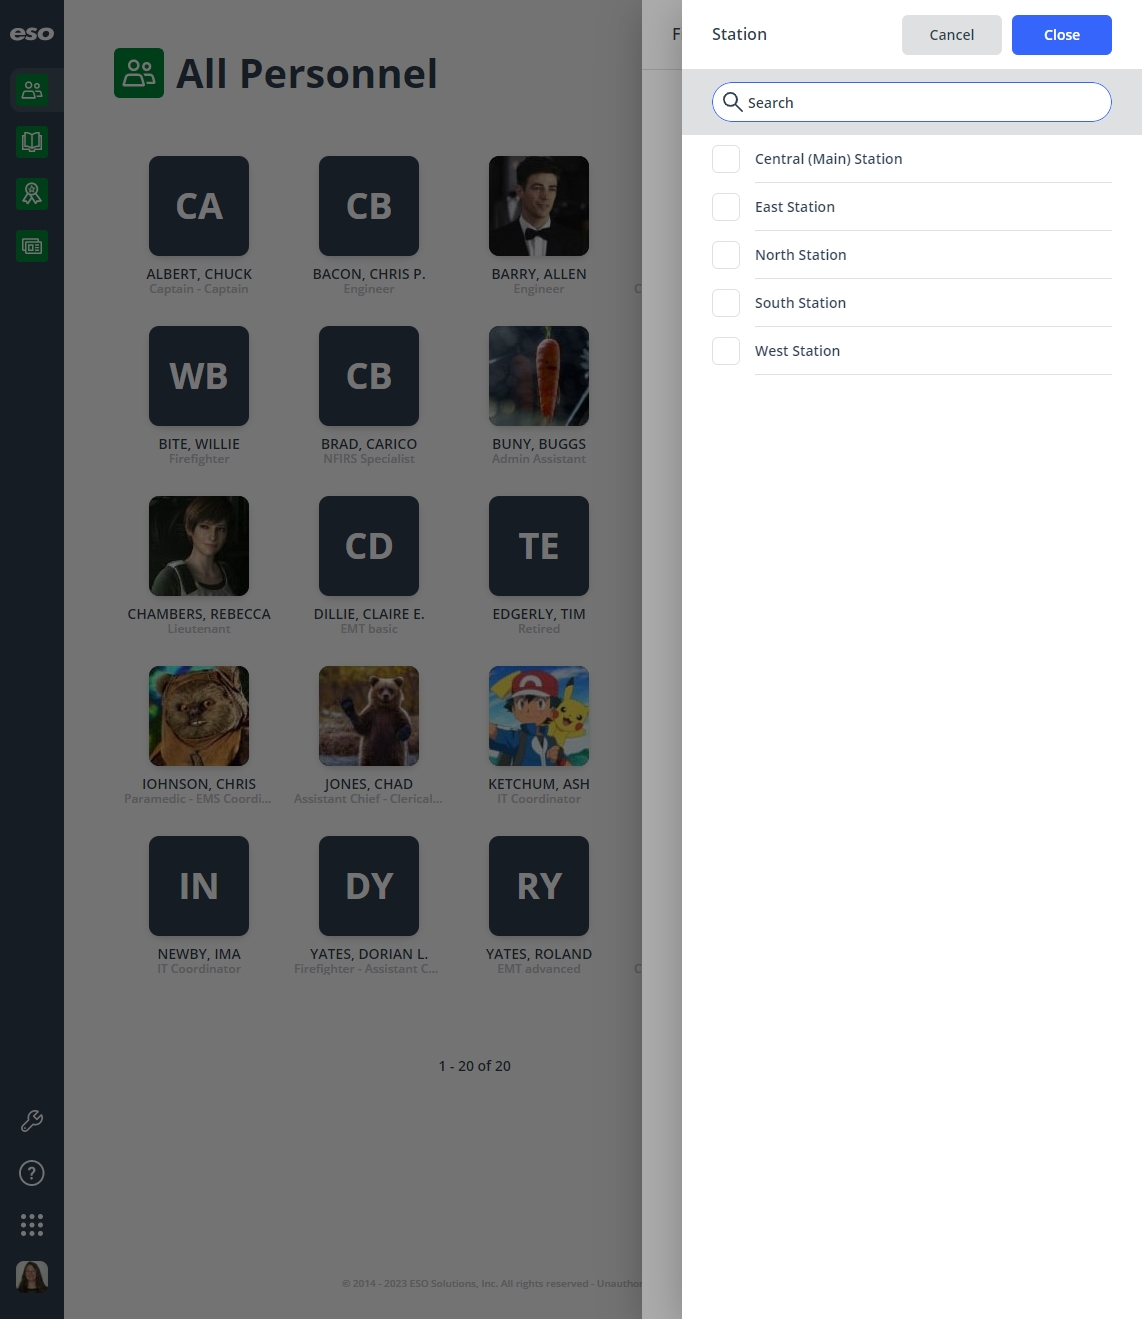
Example: In the PM module, for the Stations field, you may need options such as Central (Main) Station, East Station, North Station, South Station, and West Station. Your Admin administrator must add corresponding ADL items in the Admin module, under General > Stations, for these items to appear as menu choices in the PM module.
If no options appear, or if the menu does not have an option that meets your needs, contact your ESO Suite administrator and ask them to add the necessary menu choices. You will need to work closely with your administrator to create and maintain these lists, as your department's needs evolve over time.
Information on defining these options is available in Configure divisions, Configure shifts, Configure stations, Configure units and apparatus, and in Build a qualifications list, respectively.
-
In the upper right corner, click Filters.
The Filters dialog box appears on the right side of the screen.

-
For any of the following fields, click the list icon to the right of the field, then select all the appropriate options from the menu that appears, and click Done.
Field Searches for this Division
The organizational unit within the department or agency that the person belongs to. Common divisions are administration, training, operations, and so forth.
Shift
The named time span the person was working. A shift is one of two or more recurring periods in which different groups of personnel do the same jobs in relay.
Station
The name or location of the building the person was working from. A station is a place or building where a specific activity or service is based.
Unit
The apparatus or vehicle the person was assigned to.
Note: Units and apparatus are conceptually different from vehicles, particularly in the EMS industry. A unit may consist of one or more personnel, who can perform a particular level of service, and they may use one of any number of available vehicles. The concept of a unit captures both unit-identifying and equipment information.
Rank
The position or role the person fulfills for the department or agency. Common ranks are Chief, Captain, Lieutenant, Firefighter, Engineer, and Paramedic.
Note: Because rank is only available in the full version of PM, you can not filter for it if you have PM Basic.
Title
The current employment title of the person within the department or agency.
Note: Titles may be related to a rank, but do not necessarily fall within the defined organizational structure.
Example: Chief of Operations, and Administrative Coordinator.
Note: Because title is only available in the full version of PM, you can not filter for it if you have PM Basic.
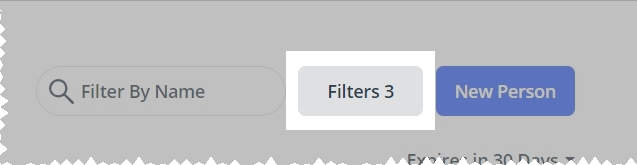
The filters you selected appear directly on each of the filter buttons.

-
For any of the following fields, click the list icon to the right of the field, select all the appropriate options from the menu that appears, then click OK or click outside the menu.
Field Searches for this Locked Out
User login accounts for personnel members that have been locked out of logging into ESO Suite.
Status
Personnel records that are active or deactivated in the ESO Suite.
Note: If you click Reset Filters, the module sets Locked Out and Status to list every locked, unlocked, and active personnel record, and clears all other filter selections you have made.
-
Click Done.
The Filters button's label updates to include a number indicating the number of filters you selected, and the list of matches that fit the filter criteria appear on the page.

Note: If you want to filter the list by only one of the methods above, such as by name, be certain that the list is not already reduced with one or more of the other methods.
Tip: You can tell at a glance if filters or a report is applied, if a number appears in parentheses on the Filters button, and/or if a report is selected on the right side of the page. You can also tell at a glance if the list is filtered by name if part or all of a name appears in the search bar on the right side of the page.
PM (full version) PM Basic 
-
-
(Optional) Export the personnel list to a
.csvfile.You can filter, sort, and export a variety of personnel lists and their related information into comma-separated values (
.csv) files, which can be read with Microsoft Excel or other software applications. You can then use these.csvfiles outside of the PM module.You can export the following personnel lists and their relevant data. Some exports contain additional information beyond what appears in a list in the PM module.
Users list
The exported data includes the person's name, employee number, work email address, ESO Suite user name and security roles, whether the person is locked out of or deactivated in the ESO Suite, and more.
Current certifications list
The exported data includes the person's name, employee number, certification information (type, name, number, jurisdiction, and so forth), issue and expiration dates, and more.
HR information list
The exported data includes the person's name, employee number, date of birth, social security number, gender, and race.
Available on applications list
The exported data includes the person's name, employee number, availability in personnel lists in the EHR and Fire Incidents modules, and whether the person is enabled in the Learning Academy module.
Note:
-
Only personnel who, on their personal record's Settings > Application Lists page, have Available in EHR set to Yes can potentially appear in the Missing State EMS Certifications list.
-
This list includes personnel who either do not have a state EMS certification, or who whose state EMS certification has expired.
-
The Learning Academy option appears only if your agency has purchased the FireRescue1 Academy or EMS1 Academy/Lexipol integration.
Expiring certifications list
The exported data includes the person's name, the certification's name, its expiration status, and date of expiration.
Missing state EMS certifications list
The exported data includes the person's name and employee number.
(PM full version) Expiring immunizations list
The exported data includes the person's name, employee number, immunization name, expiration status, and the administered and expiration dates.
(PM full version) Expiring credentials, skills, and qualifications lists
The exported data includes the person's name, credential/skill/qualification name, expiration status, and expiration date.
(PM full version) Physicals due list
The exported data includes the person's name, employee number, physical type, and due date.
-
In the upper right corner of the screen, click Export.
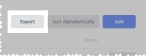
Note: The Export button does not appear if you chose the All Personnel and New Personnel lists.
The file downloads to the default download location, and saves with the file name
ESO_DataType_MMDDYYYY.csv, where where MMDDYYYY identifies the date the file was exported.Example:
ESO_Users_02212022.csvNote: If you reduced the personnel list using filters or by searching for a person by name, only the search results (the personnel listed on the page) exports to the file.
-
-
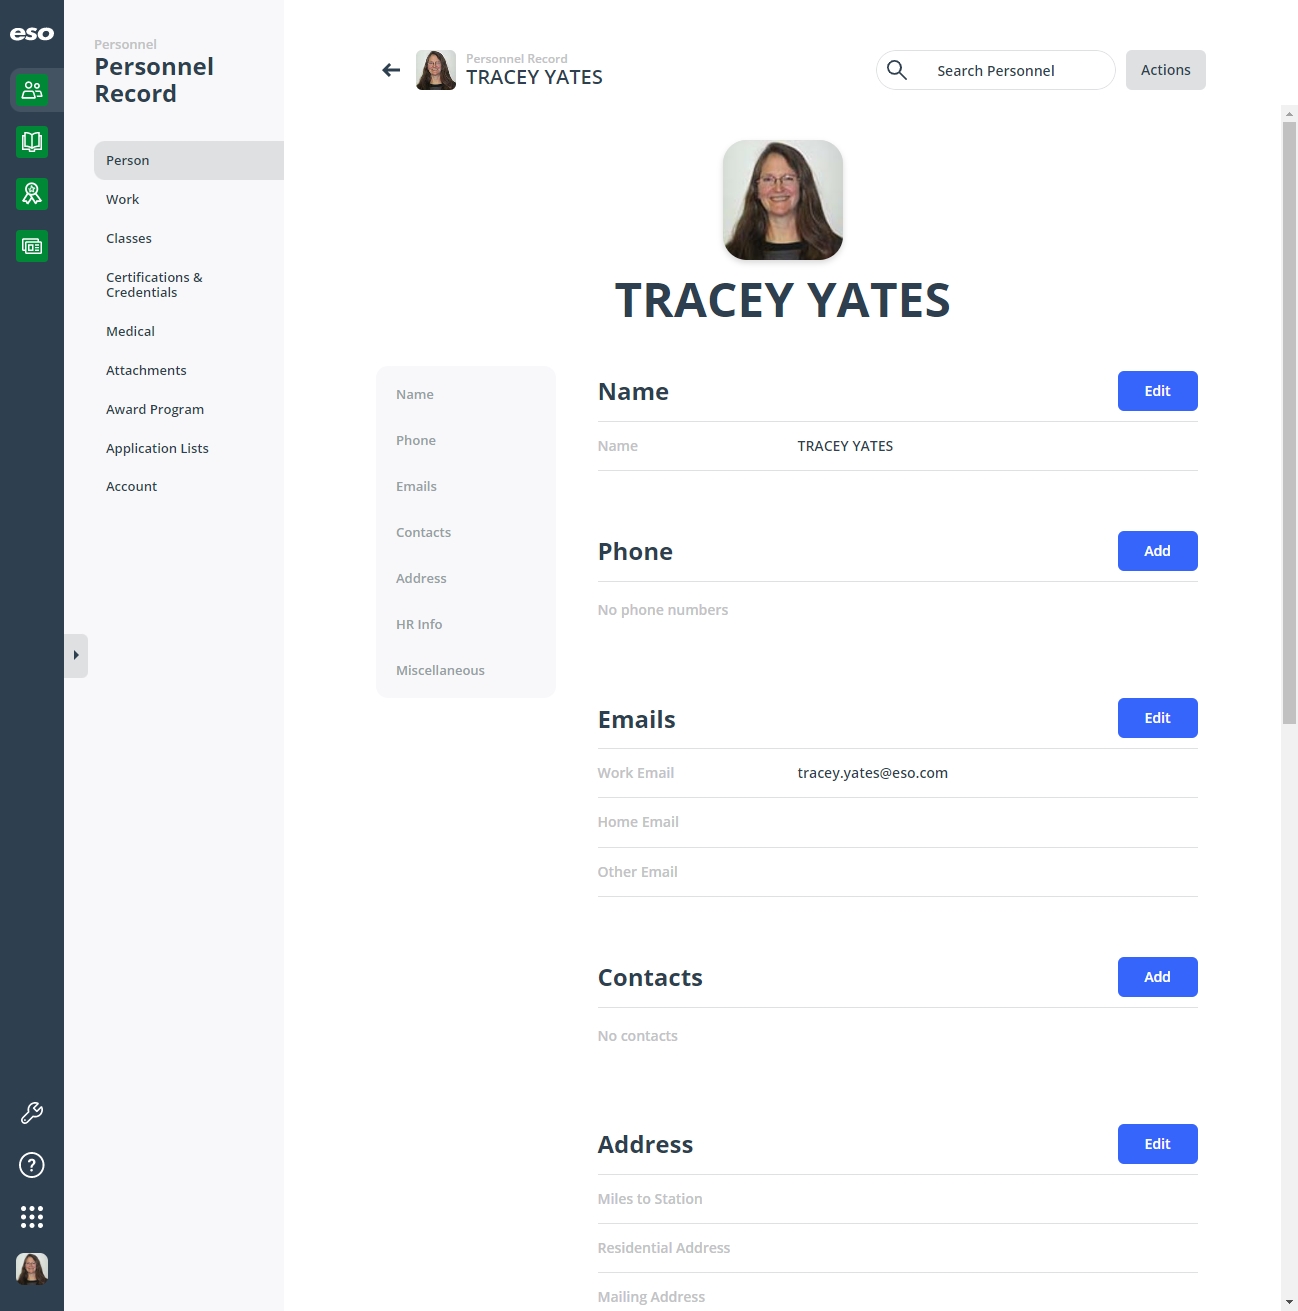
(Optional) Open the individual personnel record you want to work with.
-
Click the name of the person whose personnel record you want to work with.
PM (full version) PM Basic 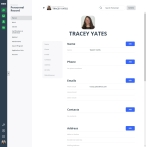

The personnel record opens and displays the page relevant to the list you were working with.
-
Work with the information for the person as needed.
-
In both PM Basic and the full-featured PM modules:
- Add or update information in the person's record, as described in Specify personal information.
- Maintain the person's work history with your agency or department, as described in Record work information.
-
List the person's endorsements, practice levels, and skills, as described in Identify certifications, licenses, practice levels, credentials, qualifications, and skills.
Note: For PM Basic, this only includes certifications, licenses, and practice levels. You must upgrade to the full PM version to also manage a person's credentials, qualifications, and skills.
- Determine whether the person's name appears in personnel lists in other ESO Suite modules, as described in Set application list visibility in other ESO Suite modules.
- Change the user name and email address associated with a person's login to the ESO Suite, as described in Manage a user account.
-
Additionally, in the full-featured PM module:
- Catalog the classes the person has taken to develop their skills, as described in Update class information.
- Provide the person's immunization, injury, and exposure information, as described in Record medical history.
- Include file attachments with the person's record, as described in Attach and work with files.
- Generate a summary report of a person's record and download or print it, as described in Print a person's history.
-
View the person's award program participation, as described in Review award programs.
-
-